Garage door springs without a safety cable are a ticking time bomb waiting to go off. This DIY tutorial shows you how to install safety cables on your garage springs to avoid a dangerous situation.
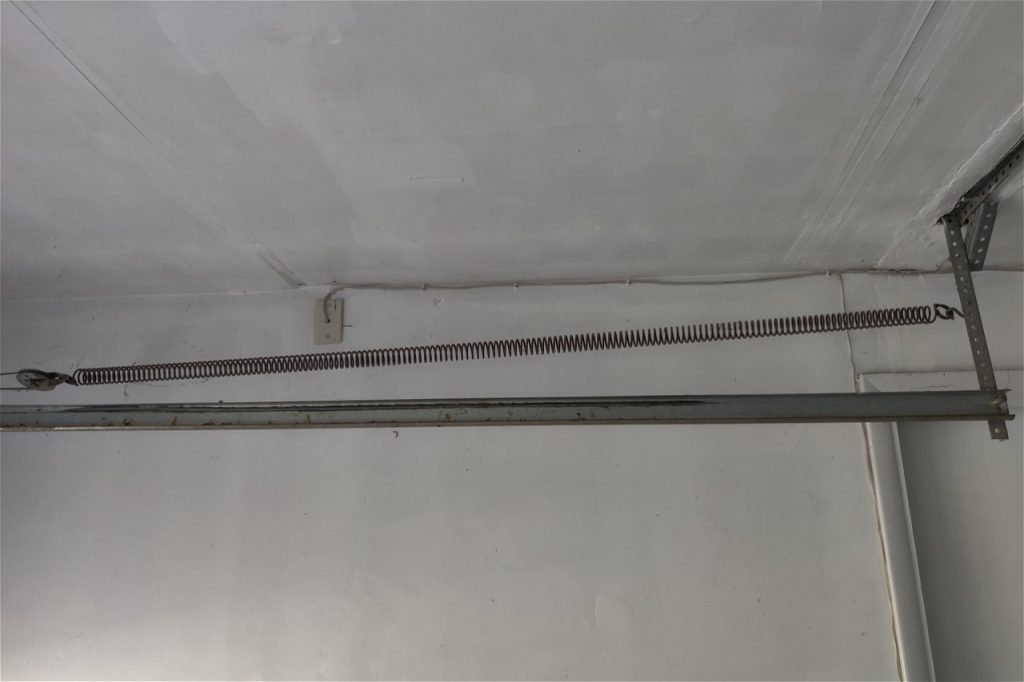
Go into your garage and look near the ceiling for two long springs on either side above the track. Those garage door extension springs help raise and close your garage door.
Without extension springs, you will have difficulty opening and closing your garage. Some garage doors can weigh as much as a hundred pounds or more.
When you lower your garage door, the springs stretch to slow down the rate of descent. The energy stored in the extended spring help lift the door the next time you open the door.
Garage extension springs are like a giant rubber band. Like rubber bands, they can unexpectedly snap.
To see whether there are garage safety cables installed, look for a wire running through the center of the spring when the garage door is closed. Most new garage spring replacement kits and installs now come with safety cables.
Installing safety cables is a task most competent homeowners can do themselves as long as they are comfortable on a ladder. A professional performing the work will likely charge you a couple hundred dollars for 20-30 minutes of work for two doors when the parts cost $30 or less.
Here is how you can prevent the springs from causing damage or injury by installing safety cables in your springs.
Table of Contents
Tools and Materials
There are two ways to do this project. The parts listed are enough for installing safety cables for a two-car garage.
The easy way is to buy the garage door safety cable kit for roughly $15 a door. If wiring only two doors, I highly recommend getting the kit since you are not saving that much money buying the individual items. With the kit, you can skip the sections about measuring, cutting, and preparing the cables and jump to Step 3 for the installation process.
Pre-Made Garage Door Safety Cable Kit
- (2) Garage safety cable kit
- A ladder

National Hardware Galvanized Safety Cable for Extension Springs
- SET OF TWO CABLES: 1/8-inch diameter by 8-feet 8-inch long steel cable
- INCLUDES: Two carabiner quick links
- QUICK: Complete kit with no additional cutting or tools required
- EASY TO INSTALL: Everything you need for installation on one garage door
Do-It-Yourself Garage Safety Cables
- 40 feet of 1/8” wire rope
- (8) 1/8” wire rope clips
- Quick Links or S-Hooks (optional)
- Wire cutter
- Tape measure
- Wrench or socket for nuts on the wire clips
- A ladder
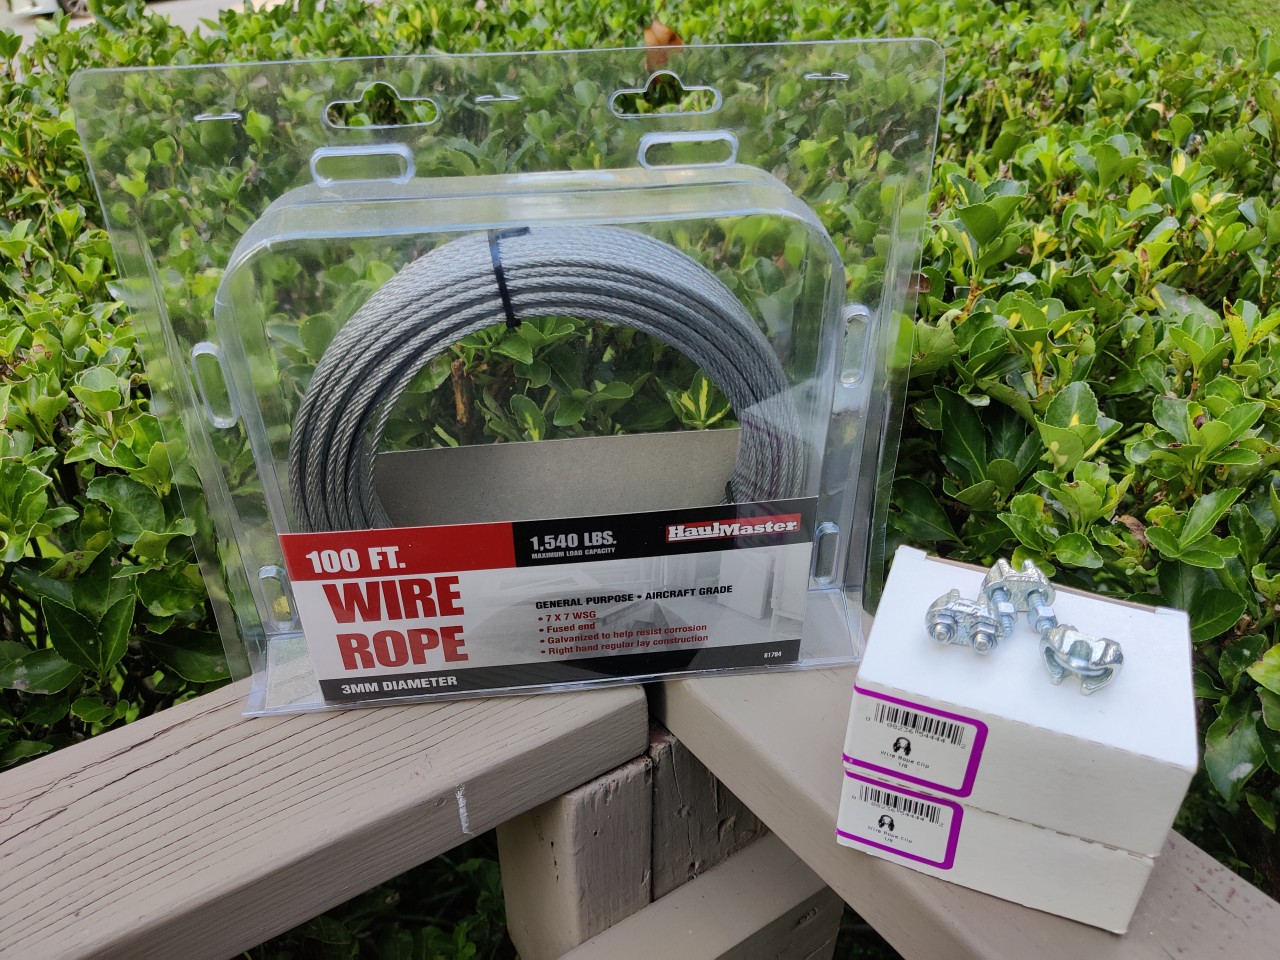
For three or more garage doors, the best price for 1/8” wire cable is at Harbor Freight. You can get 100 feet of wire for under $10. It will be even cheaper when there are 20-30% off coupons available.
Step 1. Measure the Cable Length
Measure the length of the garage door track from the vertical bracket at the back to the front wall of the garage. My garage was approximately 103 inches or 8 feet, 7 inches.
In comparison, the pre-made kit from Amazon had cables that were 8 feet, 8 inches in length. This is plenty since you will likely anchor the wire to the track.
I cut a piece of wire that was 10 feet in length. Regular wire cutters can do the job, but it will take some effort to cut through all the strands in the cable.
Step 2. Create Loops in Wire with Clips
Make two loops on each end of the wire cable using the wire rope clips. You should make one of the loops small enough to thread through the spring.
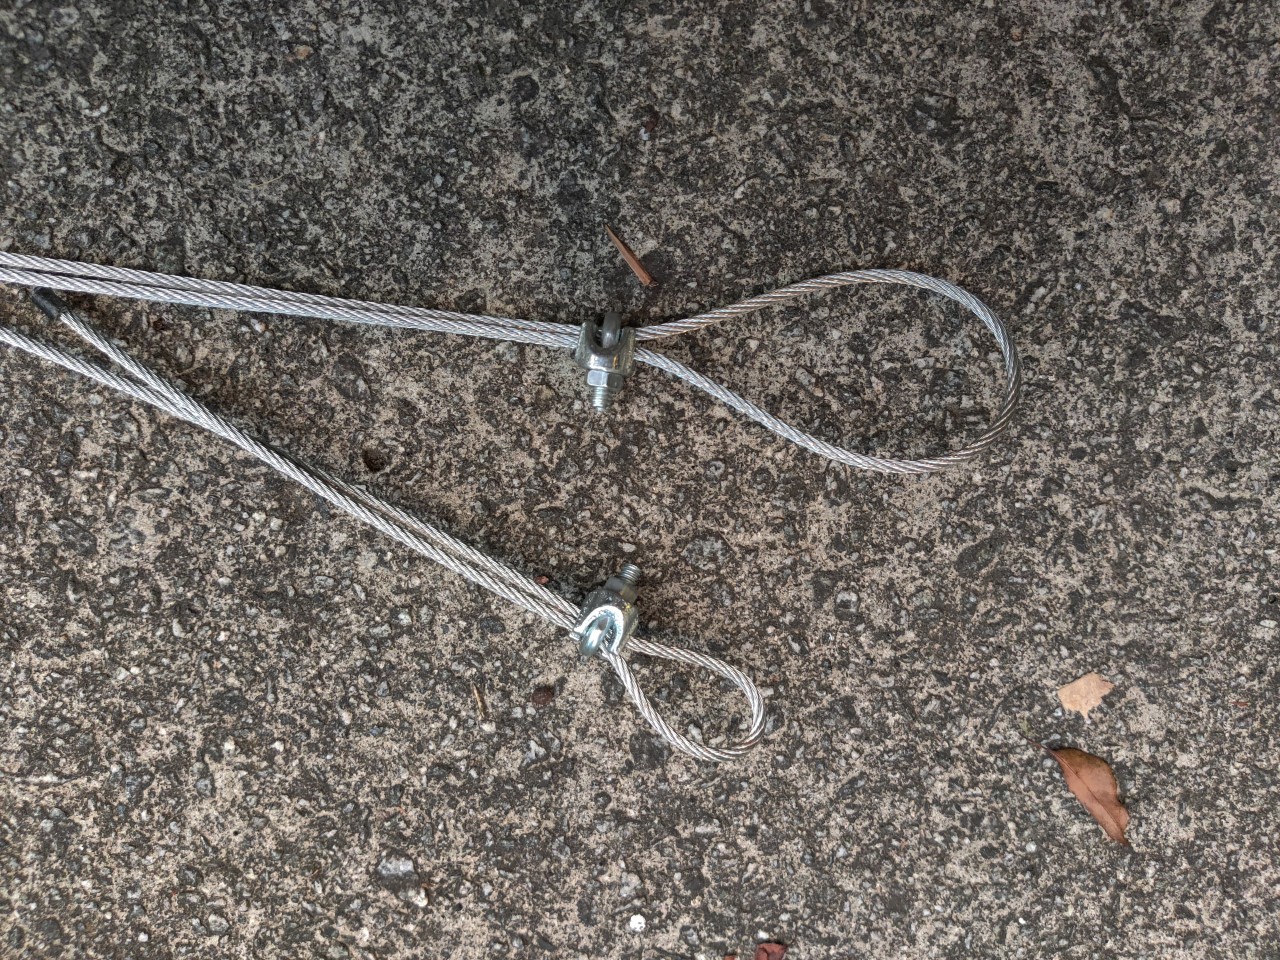
Since the cables are not used in a load-bearing application, you can likely get away with not torquing the nuts or installing more than one clip for each loop.
It is still a good habit to install the wire rope clip correctly as shown below. The wire rope clip consists of a U-Bolt, the saddle, and nuts. The dead end of the rope rests on the U-Bolt and the live end rests on the saddle. In rigging, the saying “never saddle a dead horse” can help to remember the correct orientation.
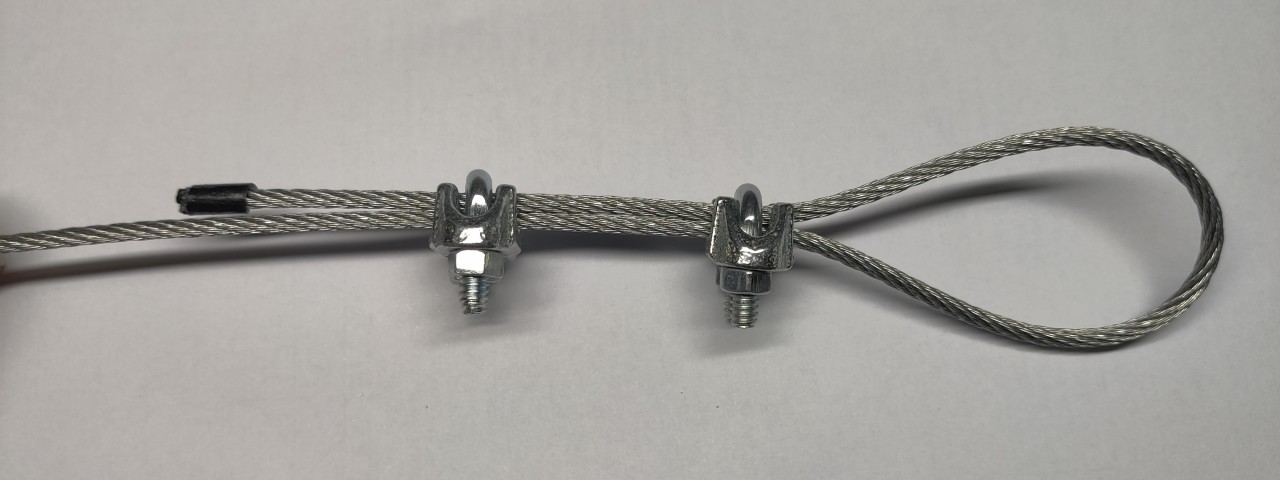
Don’t fully tighten the nuts yet since we will adjust the length of the cable later.
Step 3. Loop Cable Around Back Support
First, open the garage door completely.
This will remove the tension and compress the springs. You will have an easier time running the cable through the springs without all the gaps and you aren’t working next to a fully stretched spring that could be dangerous if it just happens to break.
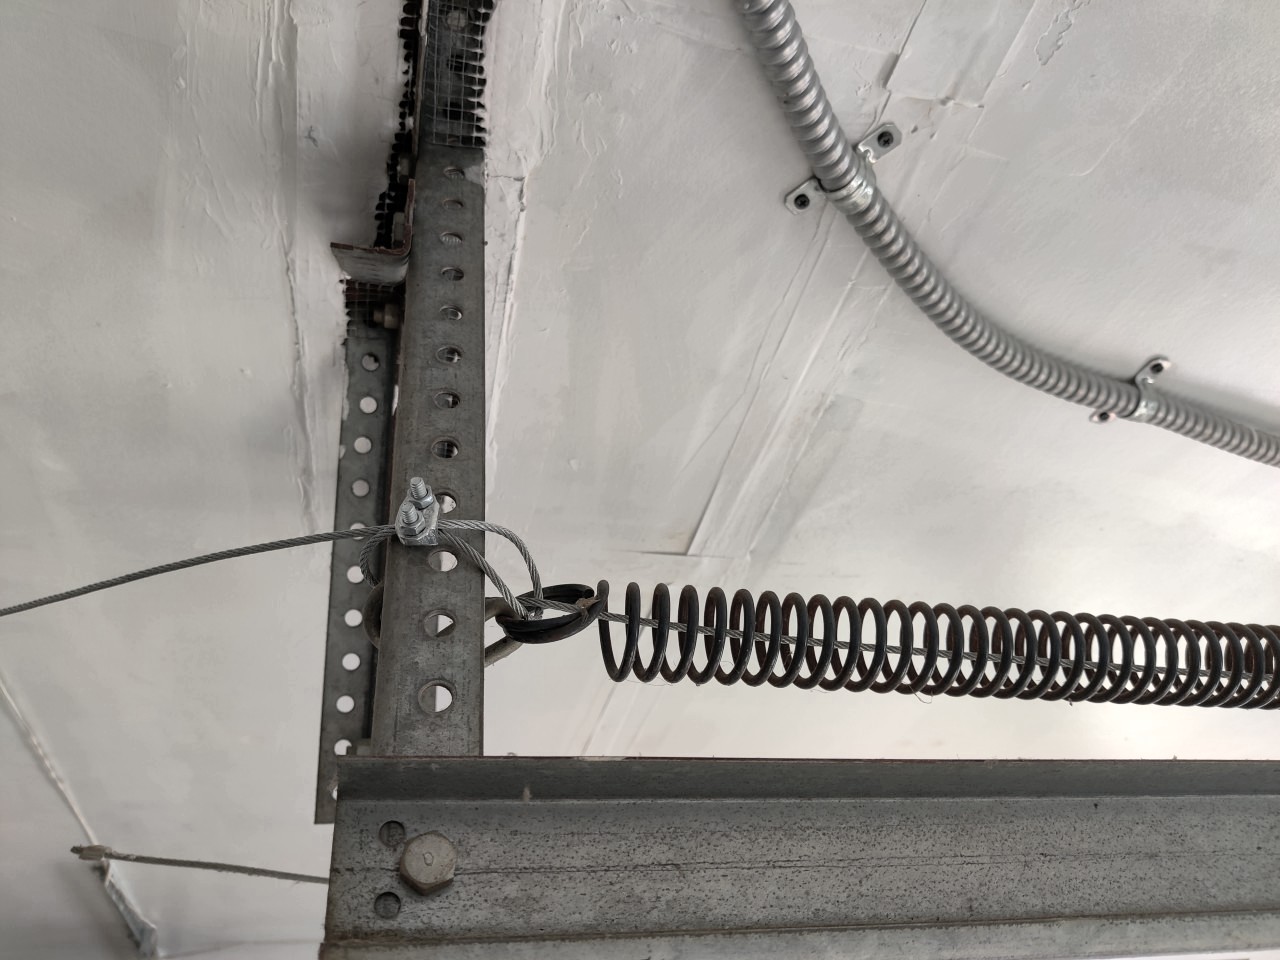
Wrap one end of the cable around the back vertical support bracket above the spring and thread the other end through the loop of the cable. Pull the rest of the cable completely through the loop.
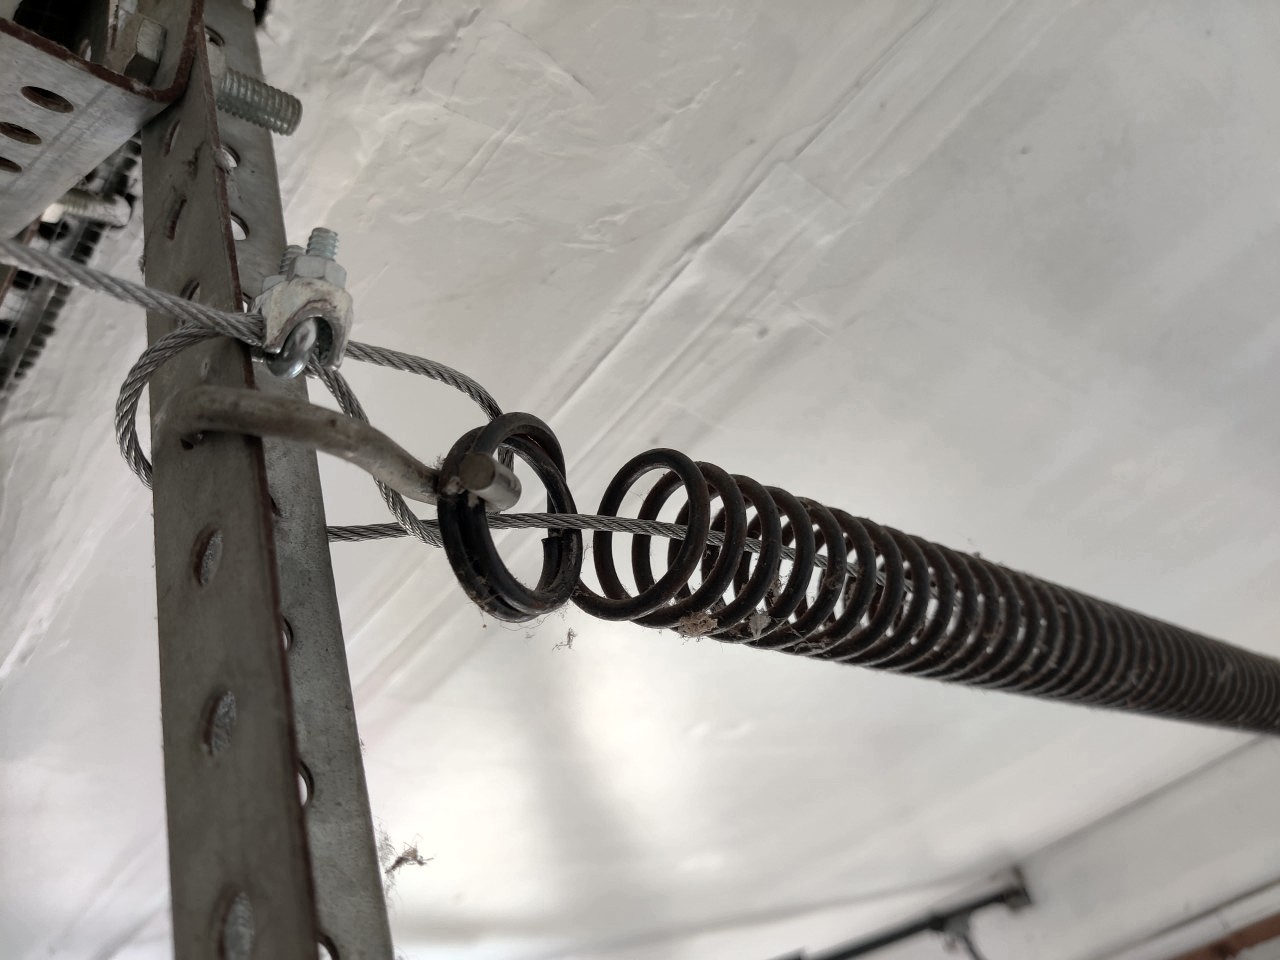
Step 4. Thread Cable through the Spring
Run the cable through the extension spring.
Be sure to include the end sections of the spring that hooks onto the eye bolt or S-Hook and the pulley. There is a possibility when the spring breaks, it will be at the end loops.
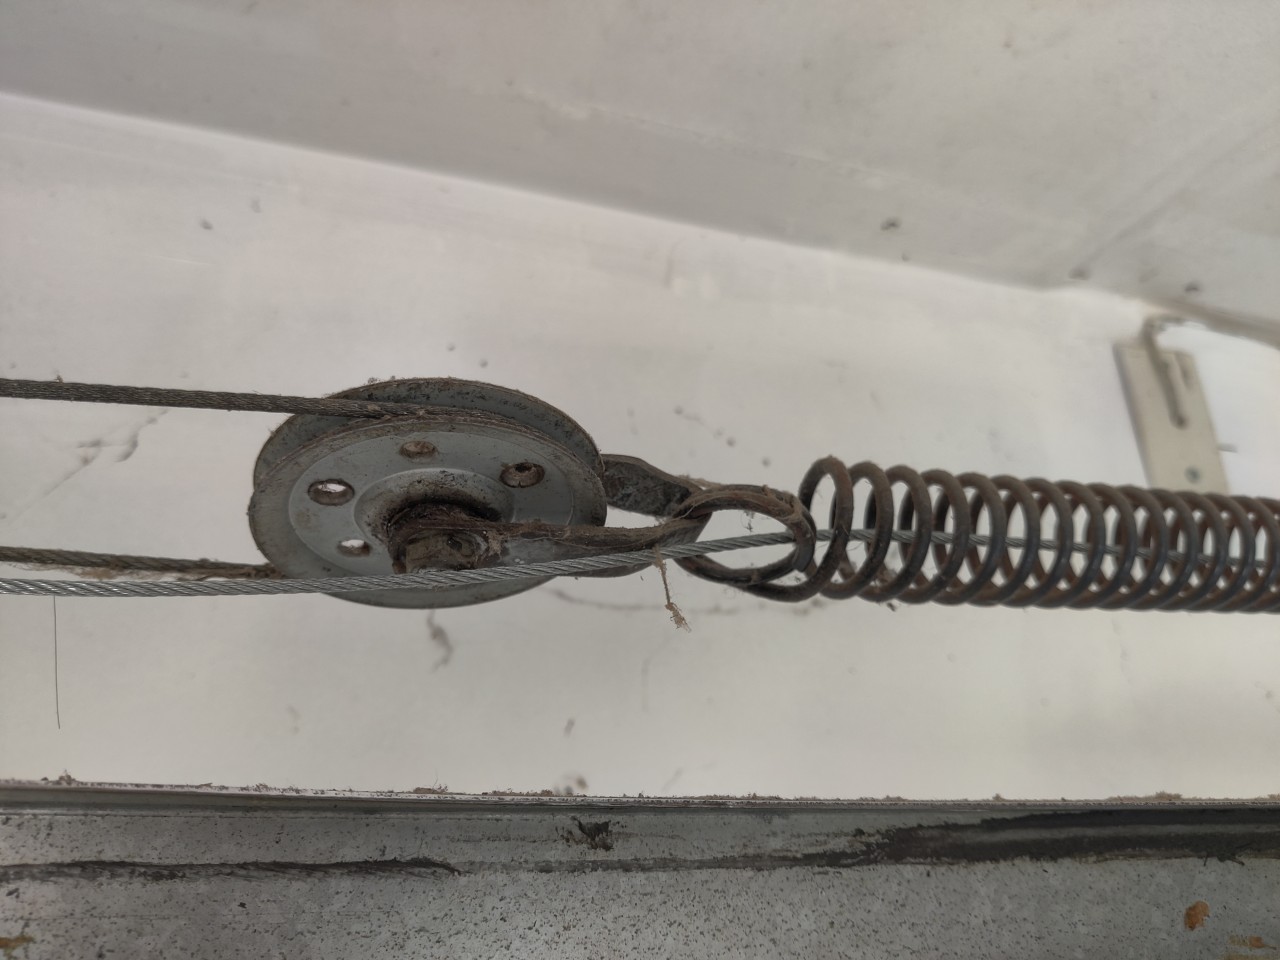
Pull the cable completely through the spring, out the other end, and to the side of the pulley. You want to prevent the safety cables from getting tangled up with the cables that raise the garage door.
Step 5. Secure End of Garage Safety Cable
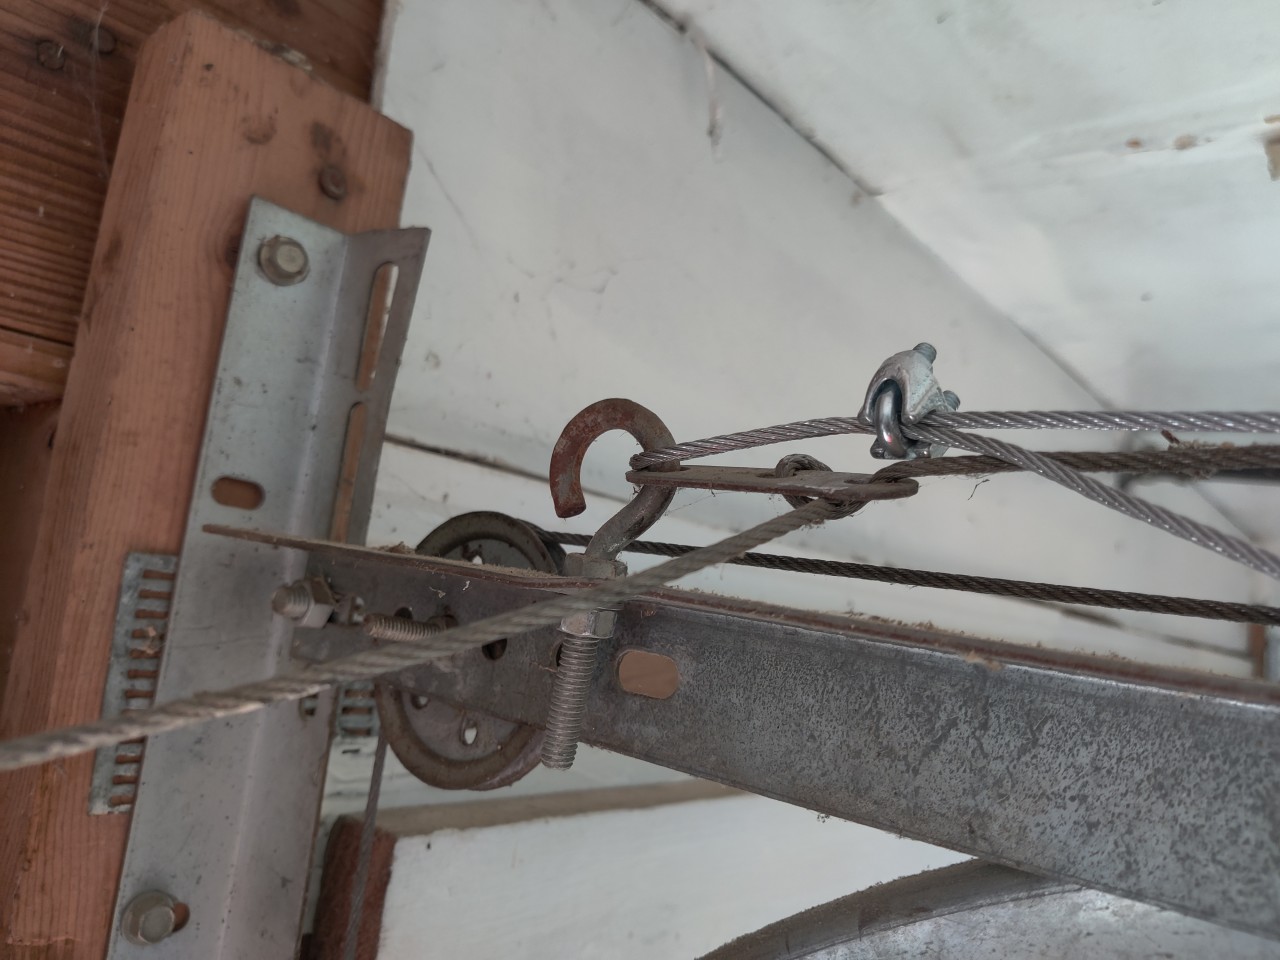
Locate a place to attach the end of the safety cable. The garage track will usually have holes in the rails.
Should the cable be too long, you can run it through various holes and around the rails to shorten it. You want the cable snug but not super tight.
The cable kit from Amazon includes a couple of Quick Links that you can use to attach the end of the cable to a hole in the rail.
Since I made my own garage door safety cables, I could adjust the cable length by pulling the extra wire through the wire clip. I could also remove the loop I created, thread the wire through a hole, loop it back on itself, and reinstall the wire clip.
I ended up attaching my safety cable to the eye bolt that was also used for the cable to the pulley. The downside of doing it this way is if I ever want to remove the pulley from the eye bolt, I will need to loosen the wire clip and remove my safety cable first. I could have attached it to the bracket on the wall, but keep in mind the flying spring will follow along the cable.
Step 6. Test Garage Door
Slowly close and open the garage door by hand using the handle on the center of the door while observing the springs and the pulleys. Do not use the automatic garage door opener.
You want the different parts of the garage door to function as if the safety cables were not there.
Should the safety cables interfere with the extension spring, pulley, or the other cables; stop and re-adjust the safety cables.
Why Do You Need Garage Door Safety Cables
Generally, garage door springs are rated for 10,000 to 20,000 cycles. Each cycle is one opening and closing of the door. Each time you leave for work and return home is two cycles. It is only a matter of time before your springs break.
Garage extension springs can weigh several pounds. These springs are most likely to break when stretching during the closing process or when they are fully extended.
When a spring breaks, it sounds like a firecracker and pieces can go flying at high speed. This could result in serious bodily injury or property damage. Murphy’s Law says the most likely casualty will be your car’s windshield, costing you hundreds of dollars to replace.
Safety cables for the garage door springs prevent a broken spring from flying all over your garage.
Neither my garage nor my parents’ garage had safety cables since the houses are older. To push the button for the garage door opener, a person had to stand directly beneath one of the springs. I decided it was best to install a set of safety cables for both houses while I was at it so I made my own cables.
Closing $ense
After reading this article, you hopefully now know how to install safety cables on your garage extension springs.
It should be a no-brainer to add this safety item to your house due to the low cost of the items needed to complete the project. There are plenty of stories online from people about their experience when a garage spring broke. In one, the spring had gone completely through a new 46″ plasma tv on the wall.
If you have any questions or comments about the process, feel free to post a comment below.
Would you be willing to share a visual on the location of these “vertical + front” points for measurements? I’m a complete newbie at this and don’t want to guess on something this crucial
[In regards to this⬇️]
Step 1. Measure the Cable Length
Measure the length of the garage door track from the vertical bracket at the back to the front wall of the garage. My garage was approximately 103 inches or 8 feet, 7 inches.
In comparison, the pre-made kit from Amazon had cables that were 8 feet, 8 inches in length. This is plenty since you will likely anchor the wire to the track.
Hello, I measured from the vertical bracket at the back to the front of the garage. By this, I mean:
In the photo at the very top of this post, you can see the vertical bracket at the far right of the picture attached to the ceiling. This is the same as what you see in the photo in Step 3 where there is the metal piece with all the holes where the cable loops around.
The front wall, you can see in step 5. I measured it to the 2×4. You can see a metal bracket mounted to the 2×4 with a couple vertical slits / holes next to the pulley (or wheel). If I didn’t attach the safety cable to the eyebolt, I would have ran the cable through one of these slits.