Do you have a damaged extension cord or electrical cord from a mishap or normal wear and tear? Rather than throwing out the extension cord, appliance, or power tool, here is a simple DIY tutorial to repair that power cord so it is like new again.
There are many ways people have fixed mangled or cut extension cords, such as using wire nuts or butt connectors. While those methods may get your electrical cord working again, they are more of a temporary fix. This method is a much more permanent repair that is safer and less likely to fail in the future.
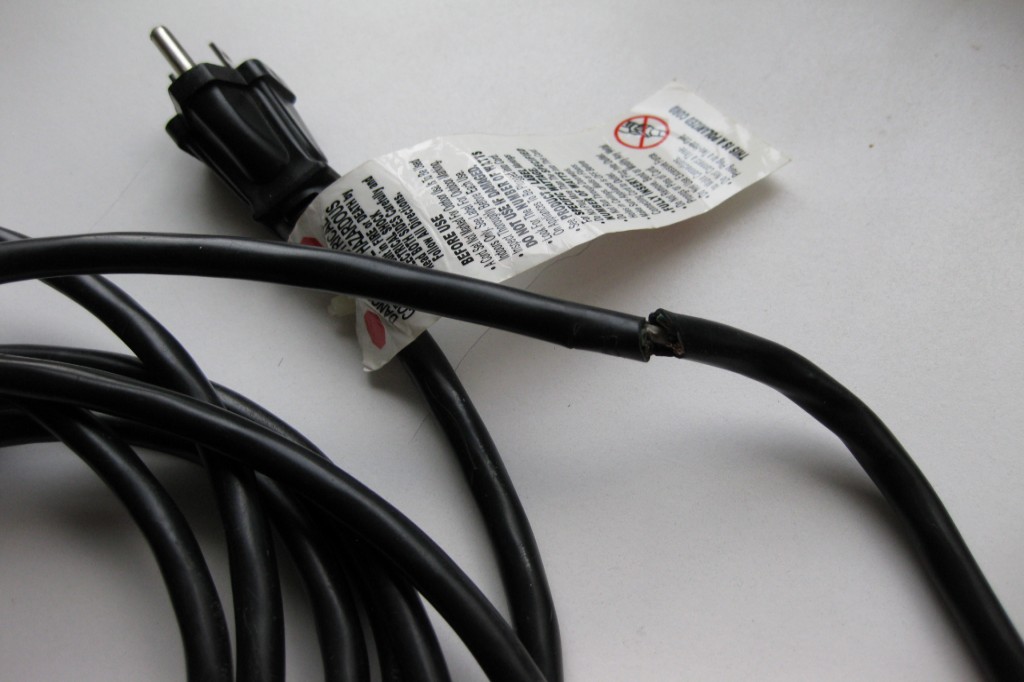
While trimming the hedges at dusk with an electric hedge trimmer earlier this month, my extension cord had a minor run-in with the hedge trimmer. Ok, maybe it was a major run-in. There was a giant bright orange spark and it tripped the GFCI outlet on the other side of the house.
Should you end up looking at two pieces of an extension cord that used to be one, here is how to easily fix it.
Table of Contents
Tools and Materials
You will need the following items for this repair job:
- Soldering iron
- Lead solder
- Heat shrink tubing
- Utility knife
- Wire cutter or scissors
- Wire stripper
- Heat gun (optional)
Step 1 – Remove Damaged Section
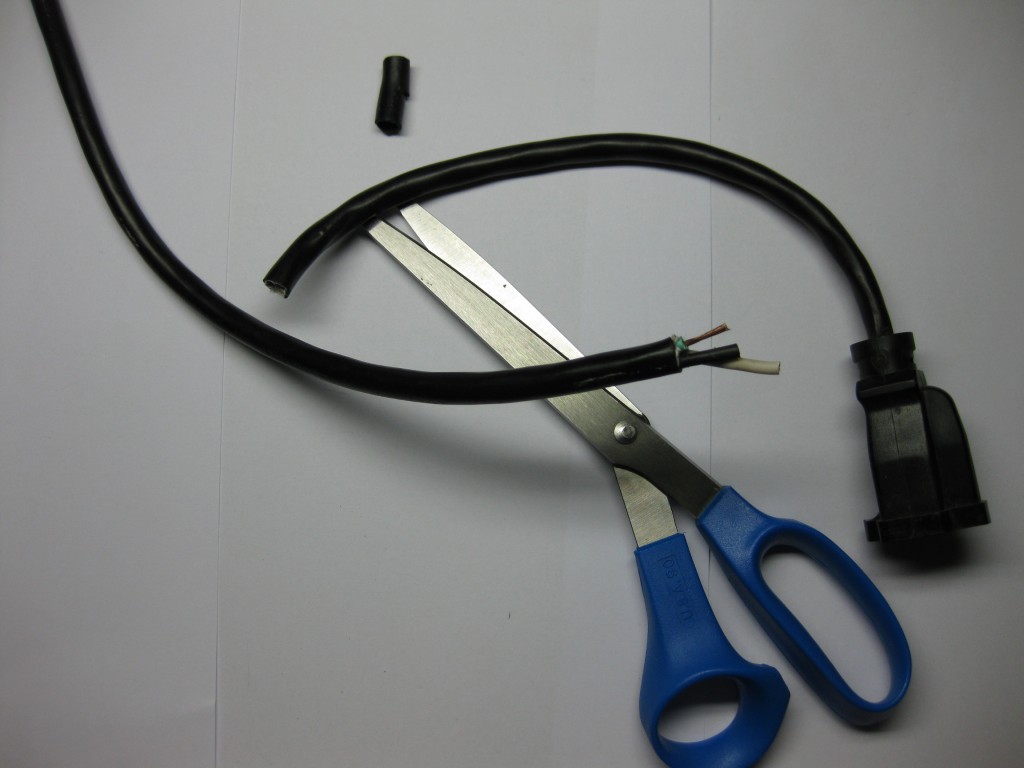
Using a pair of wire cutters or sharp scissors, cut out the damaged section.
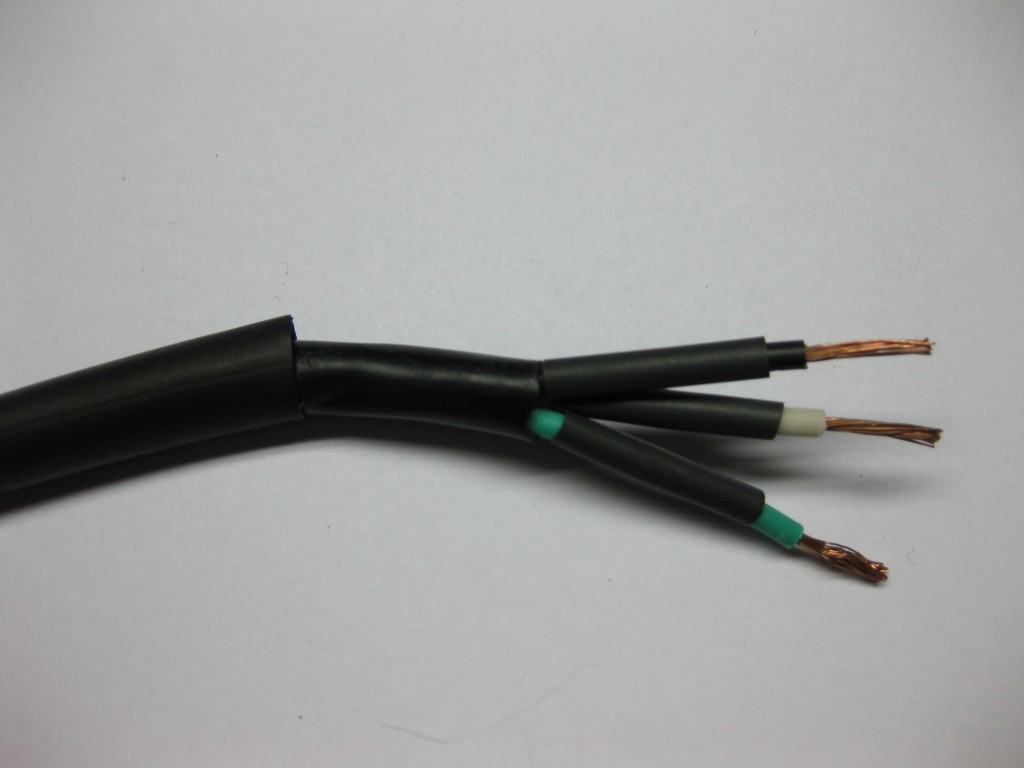
Step 2 – Remove Extension Cord Insulation

Carefully score the outer insulation with the utility knife about 1.5 to 2 inches from the end. Be careful not to nick the electrical wires within. Pull off the insulation to expose the wires inside.
Repeat on the other end of the extension cord.
After removing the insulation, decide if you want to stagger the lengths of the hot, neutral, and ground wires so that all the soldered joints are not at the same spot.
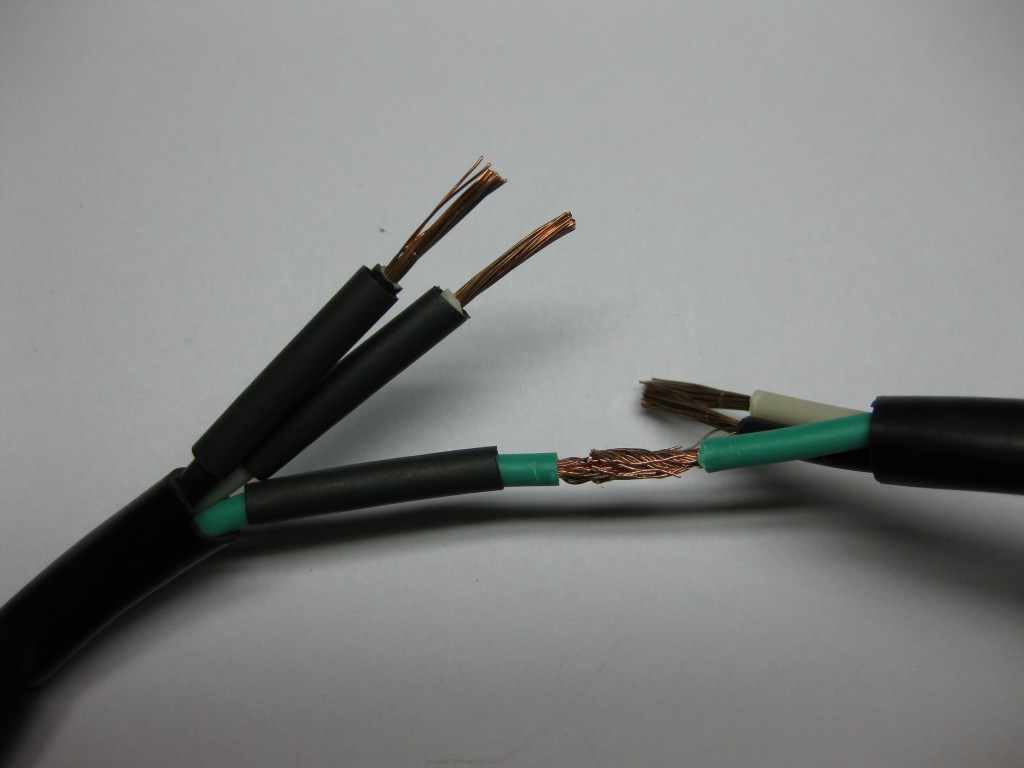
Step 3 – Strip Electrical Wires

Remove a quarter to half-inch of the insulation from the wires with the pair of wire strippers.
If you do not have a wire stripper handy, you can use a utility knife or a pair of sharp scissors to carefully score the insulation similar to the outer sheathing. You will want to avoid cutting the individual copper strands within the wiring or you will reduce the rated amperage of the extension cord.
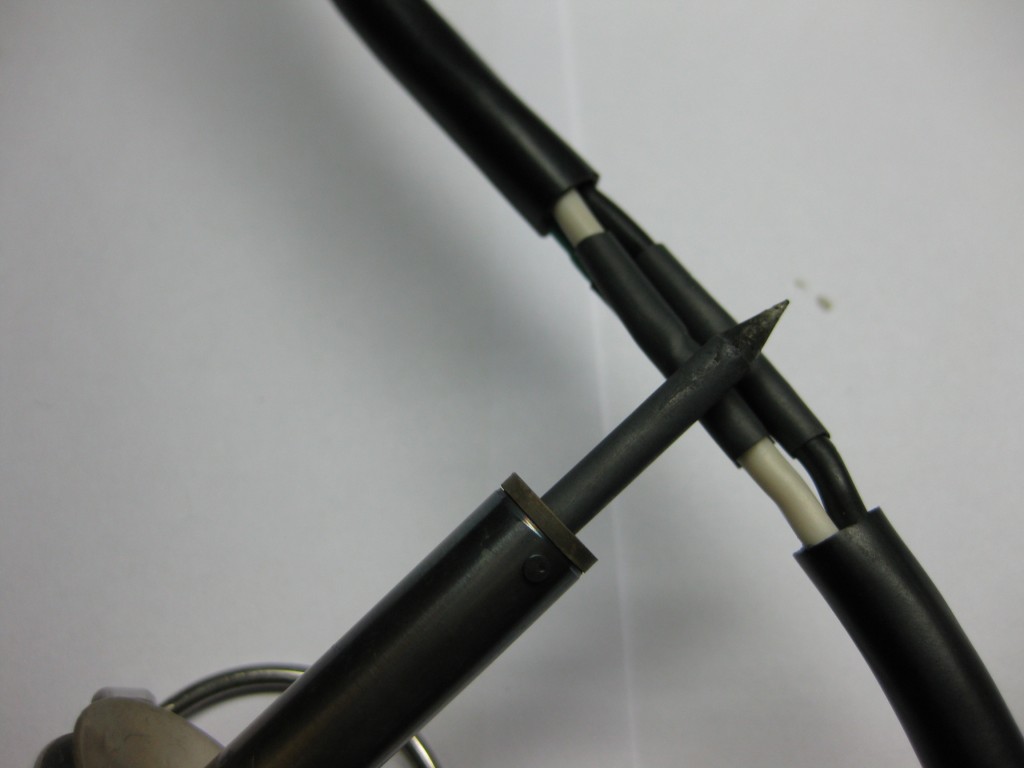
Step 4 – Put on Heat Shrink
Cut and slide the appropriate size heat shrink tubing on all the wires. Do not forget the big piece on the outer cord.
If you skip this step, you will have to re-do all your soldering work again.
For an outdoor extension cord, consider using adhesive-lined heat shrink for a water-tight seal.
Step 5 – Solder the Wires Together
Match up the wires’ colors and twist them around each other.
Now with the hot soldering iron, touch the tip to the wire and wait while the wire heats up. Periodically touch the solder to the wire to see if it’s hot enough. When the wire gets to the proper temperature, the lead solder will smoke and melt.
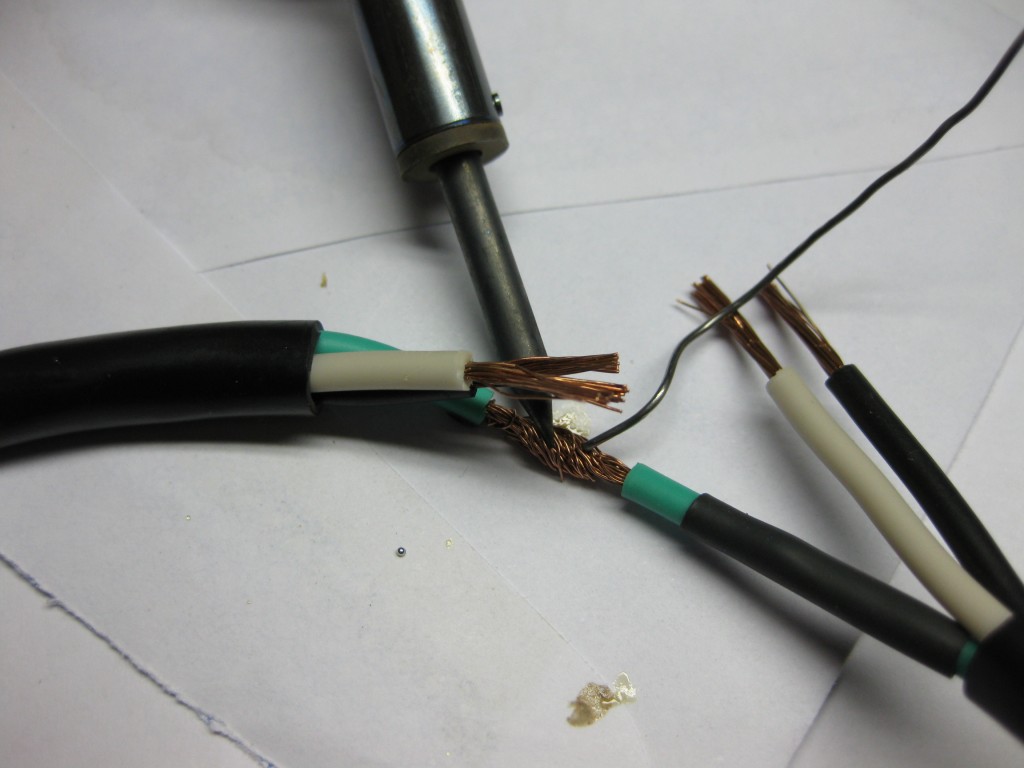
Apply the solder to the joint and melt enough solder to cover the wire.
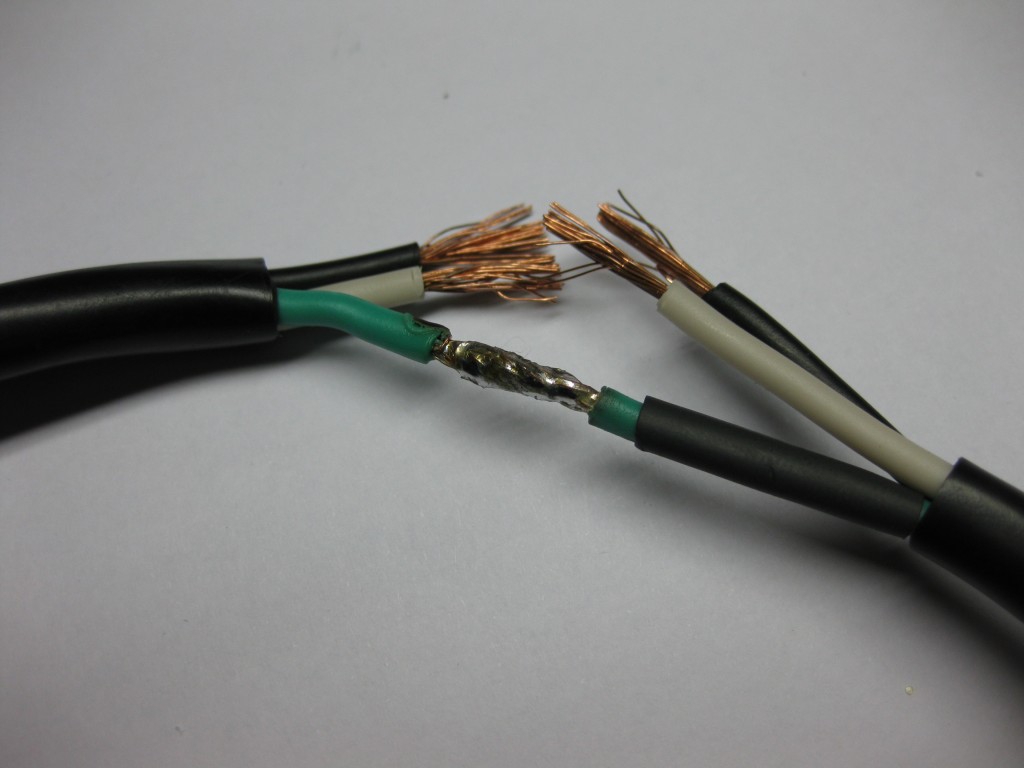
One down, two more to go. That wire will not be going anywhere.
Step 6 – Shrink the Heat Shrink
Use a heat gun to shrink the heat shrink around the repair.
If you do not have a heat gun available, you can run the hot soldering iron quickly back and forth over the heat shrink and it will work just as well. Don’t linger on one spot to avoid burning the heat shrink.
If you did not use heat shrink that had adhesive on the inside, one thing you can do now is apply dielectric grease to the soldered joints before heat shrinking it.
Closing $ense
This tutorial is best suited for damage a bit further from the ends of the extension cord. If the damaged area is close to the male or female end of the plug on the electrical cord, a better solution is to go to the hardware store and buy a replacement plug end. Then follow this repair guide on how to replace an extension cord plug.
Using the method outlined in this article will result in a much more permanent repair of your power cord should you accidentally cut your cord in two, get it chewed up by the vacuum cleaner, or ran over it with the lawnmower. If done correctly, the lead solder will be infused throughout the copper wire strands. The repair will be as strong as the original.
Keep in mind that splicing an extension cord is not permitted by the National Electrical Code. The repaired extension cord will not have the same abrasion resistance as the original. So should you do it? As long as the repaired cord isn’t being used on a job site at work, you should be able to do whatever you want with your personal extension cords. Save some money instead of throwing out a perfectly repairable electrical cord.
Upon searching online, many people have cut their extension cords in half with hedge trimmers. Maybe people like us should stick with hedge shears.