Table of Contents
The Background Story
A family member is currently venturing into starting their own business. After working for other people the last several years and dealing with long commutes and office politics, he has decided to go off on his own after a layoff.
There are many benefits to being your own boss. You get to make your own decisions. If successful, the sky is the limit for your earnings. When it’s time to retire, you can cash-out your hard work by selling the business.
Unlike me, who’s able to work from anywhere, whether it is from home, at a coffee shop, or at public libraries, he needed a physical office, and one of the things that every office needs is furniture.
Normally you can find used office furniture such as desks, bookcases, and file cabinets on Craigslist for amazing prices. In some instances, even for free. In his case, he needed a lot of guest chairs for the waiting room, and they needed to match.
After spending a day driving around to office supply stores, furniture outlets, and used furniture warehouses to see what was available, we came to the conclusion that 1) even used business furniture can be really expensive, and 2) finding close to 20 used chairs was really hard. Our best bet was Office Depot, which had new chairs for $50 each.
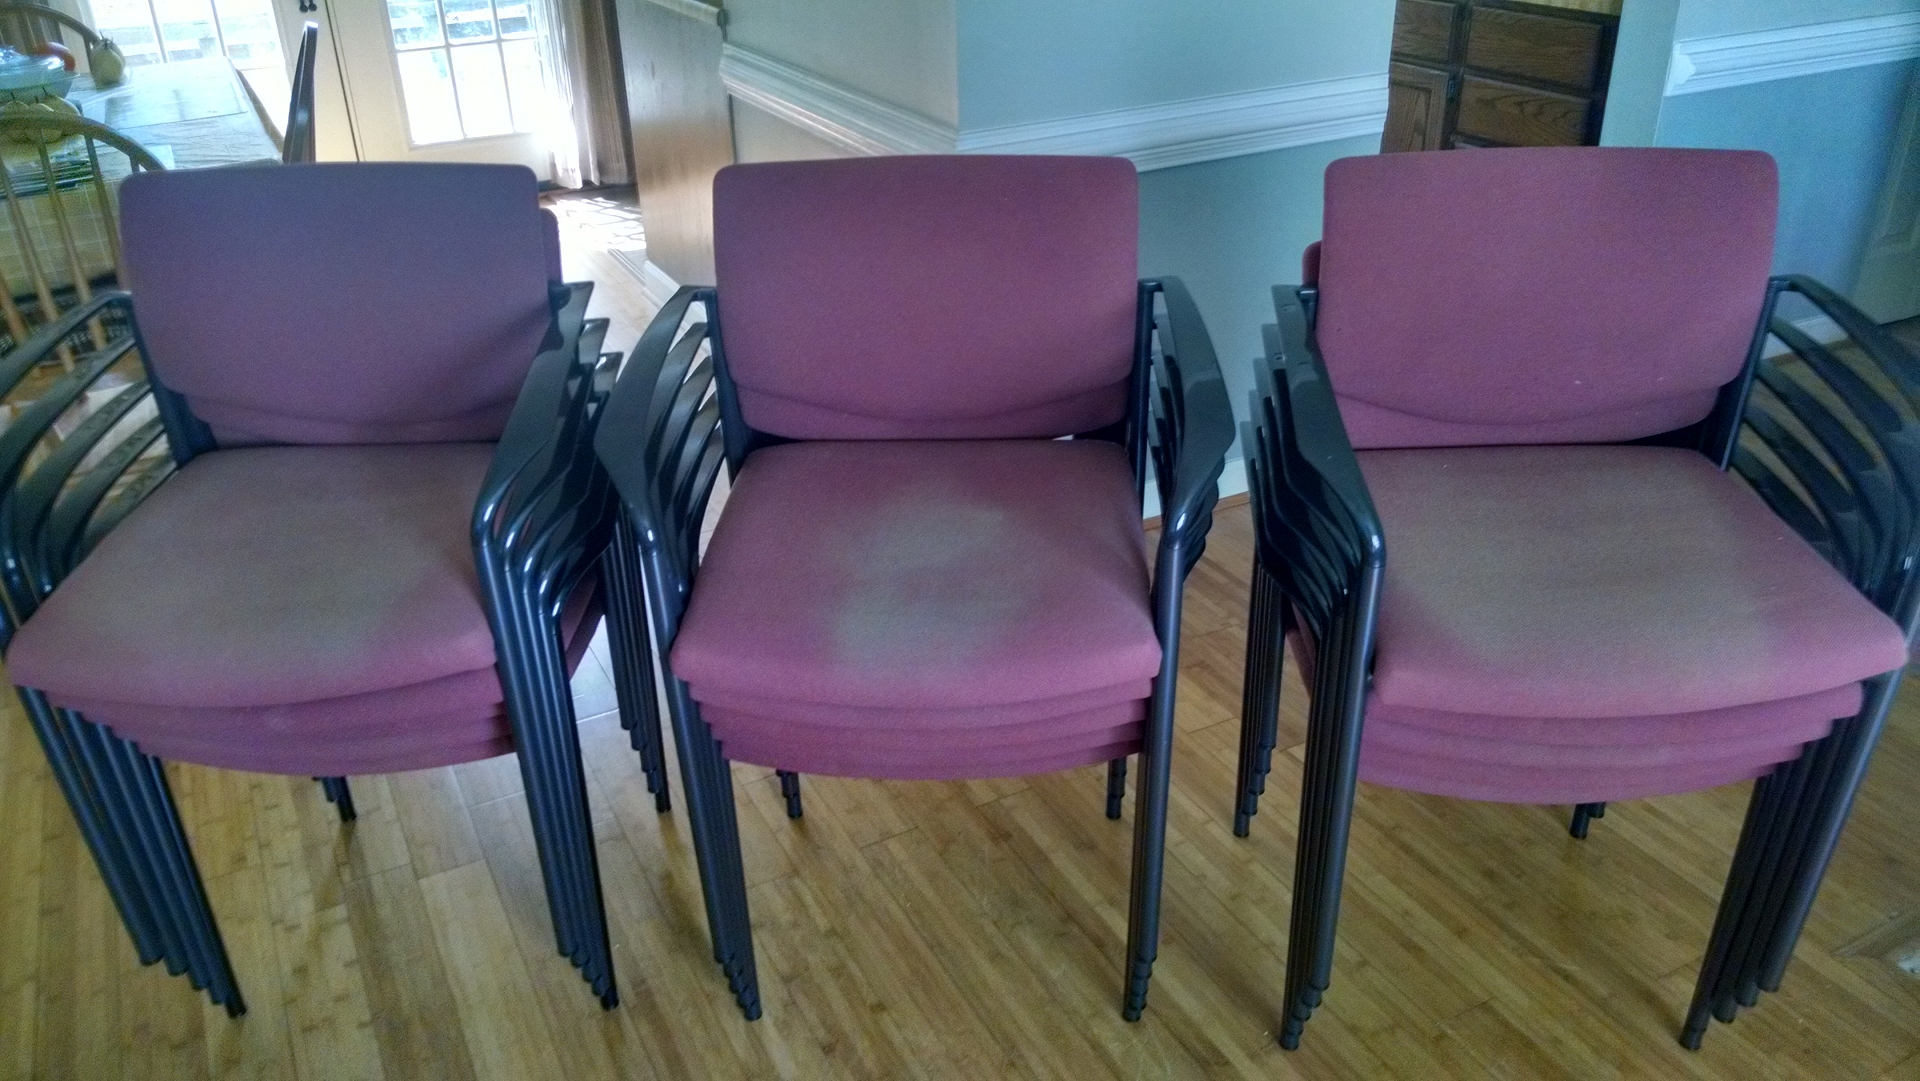
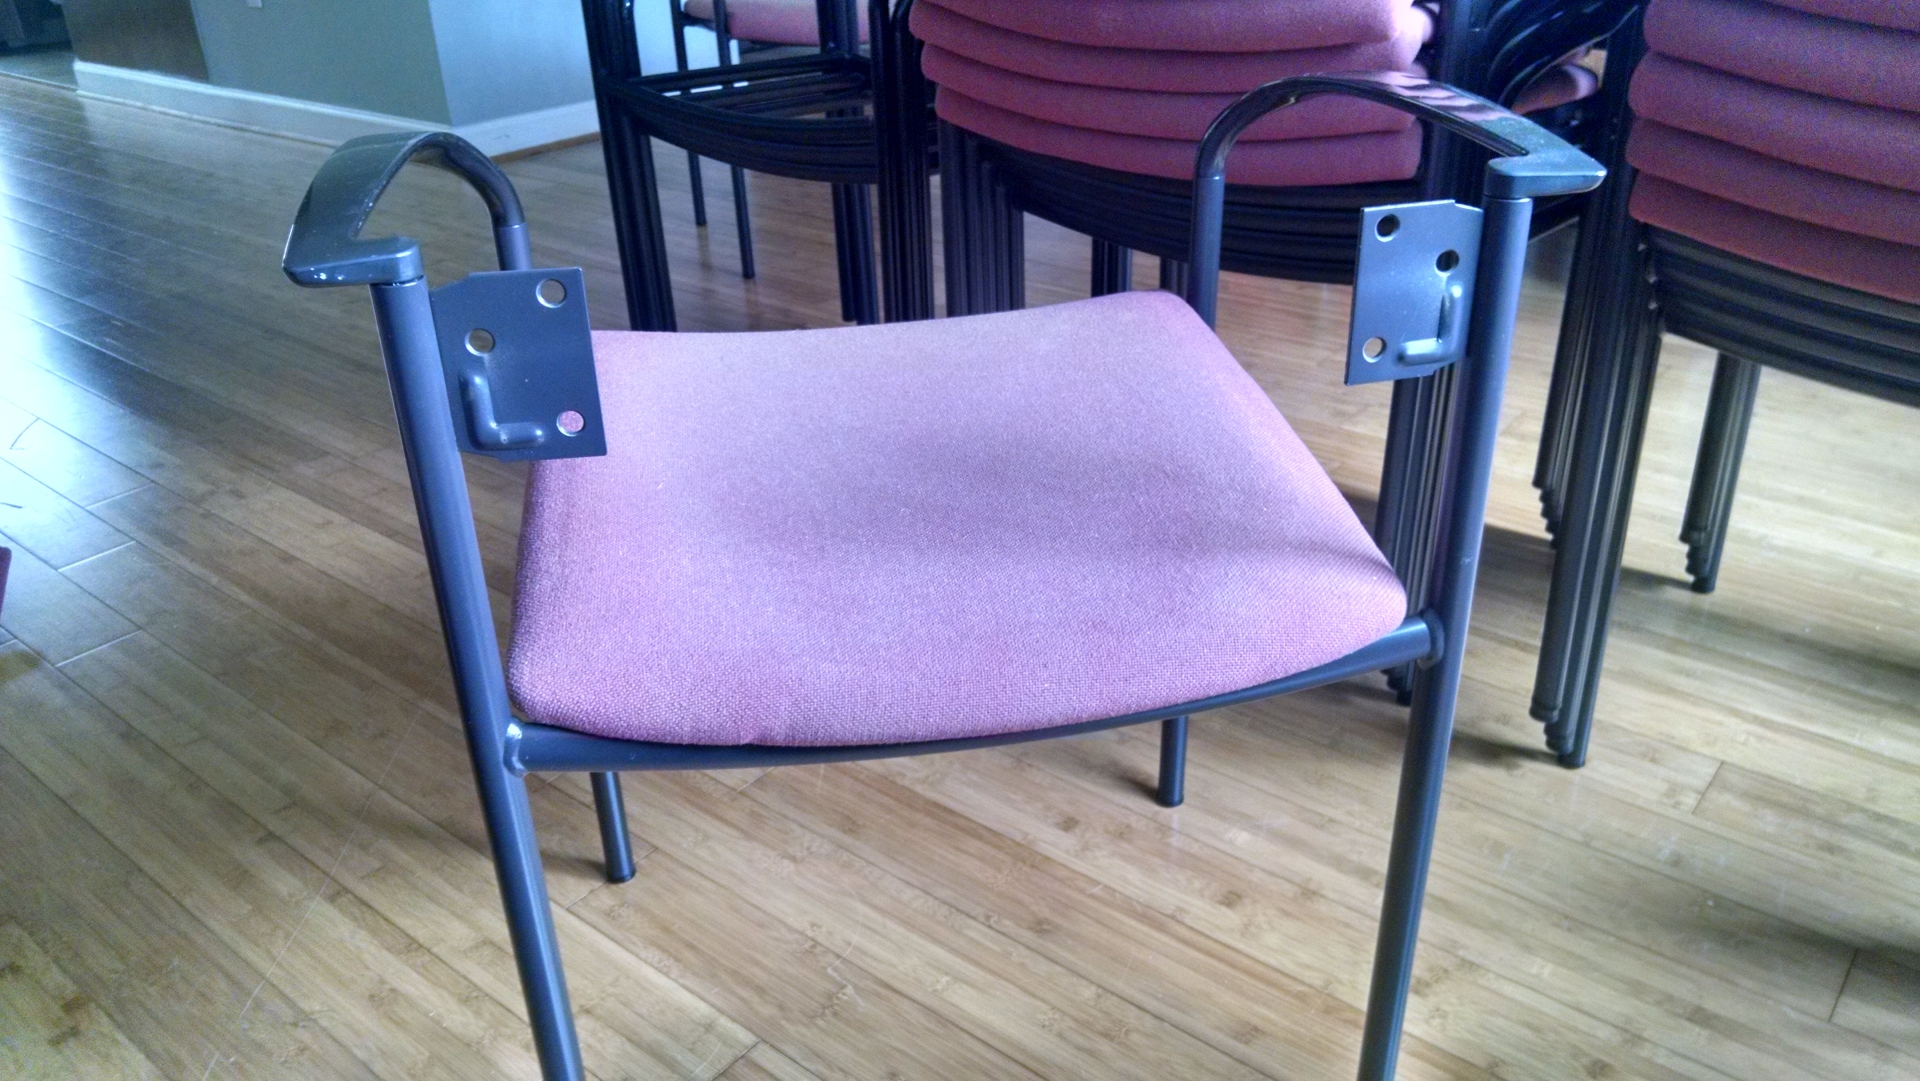
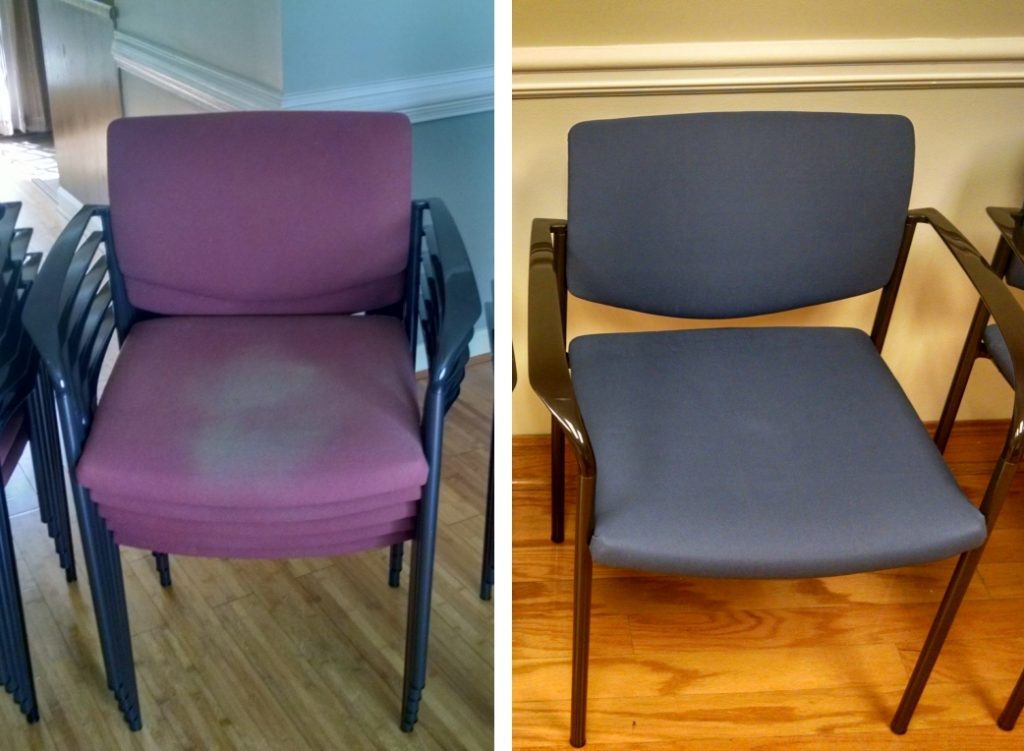
We then went online onto Craigslist to see what was available and found a post by someone who was liquidating an entire office building that used to be occupied by AT&T. Upon showing up, we found a roomful of stackable Steelcase Player guest chairs that were a perfect fit. It turns out they’ve been selling everything off for 3 months already, and what was left were in poor to fair condition with the fabric on the seats badly faded. The seller assured us that all we needed to do was re-dye it with fabric dye in a spray can that can be found at JoAnn and it would be good as new.
The cost? $10 a chair. We handed over $150 and carted home 15 chairs. It’s hard to say no to $600 in savings when you are bootstrapping a new business. Plus, butts won’t know the difference between a new or used chair. At least mine can’t.
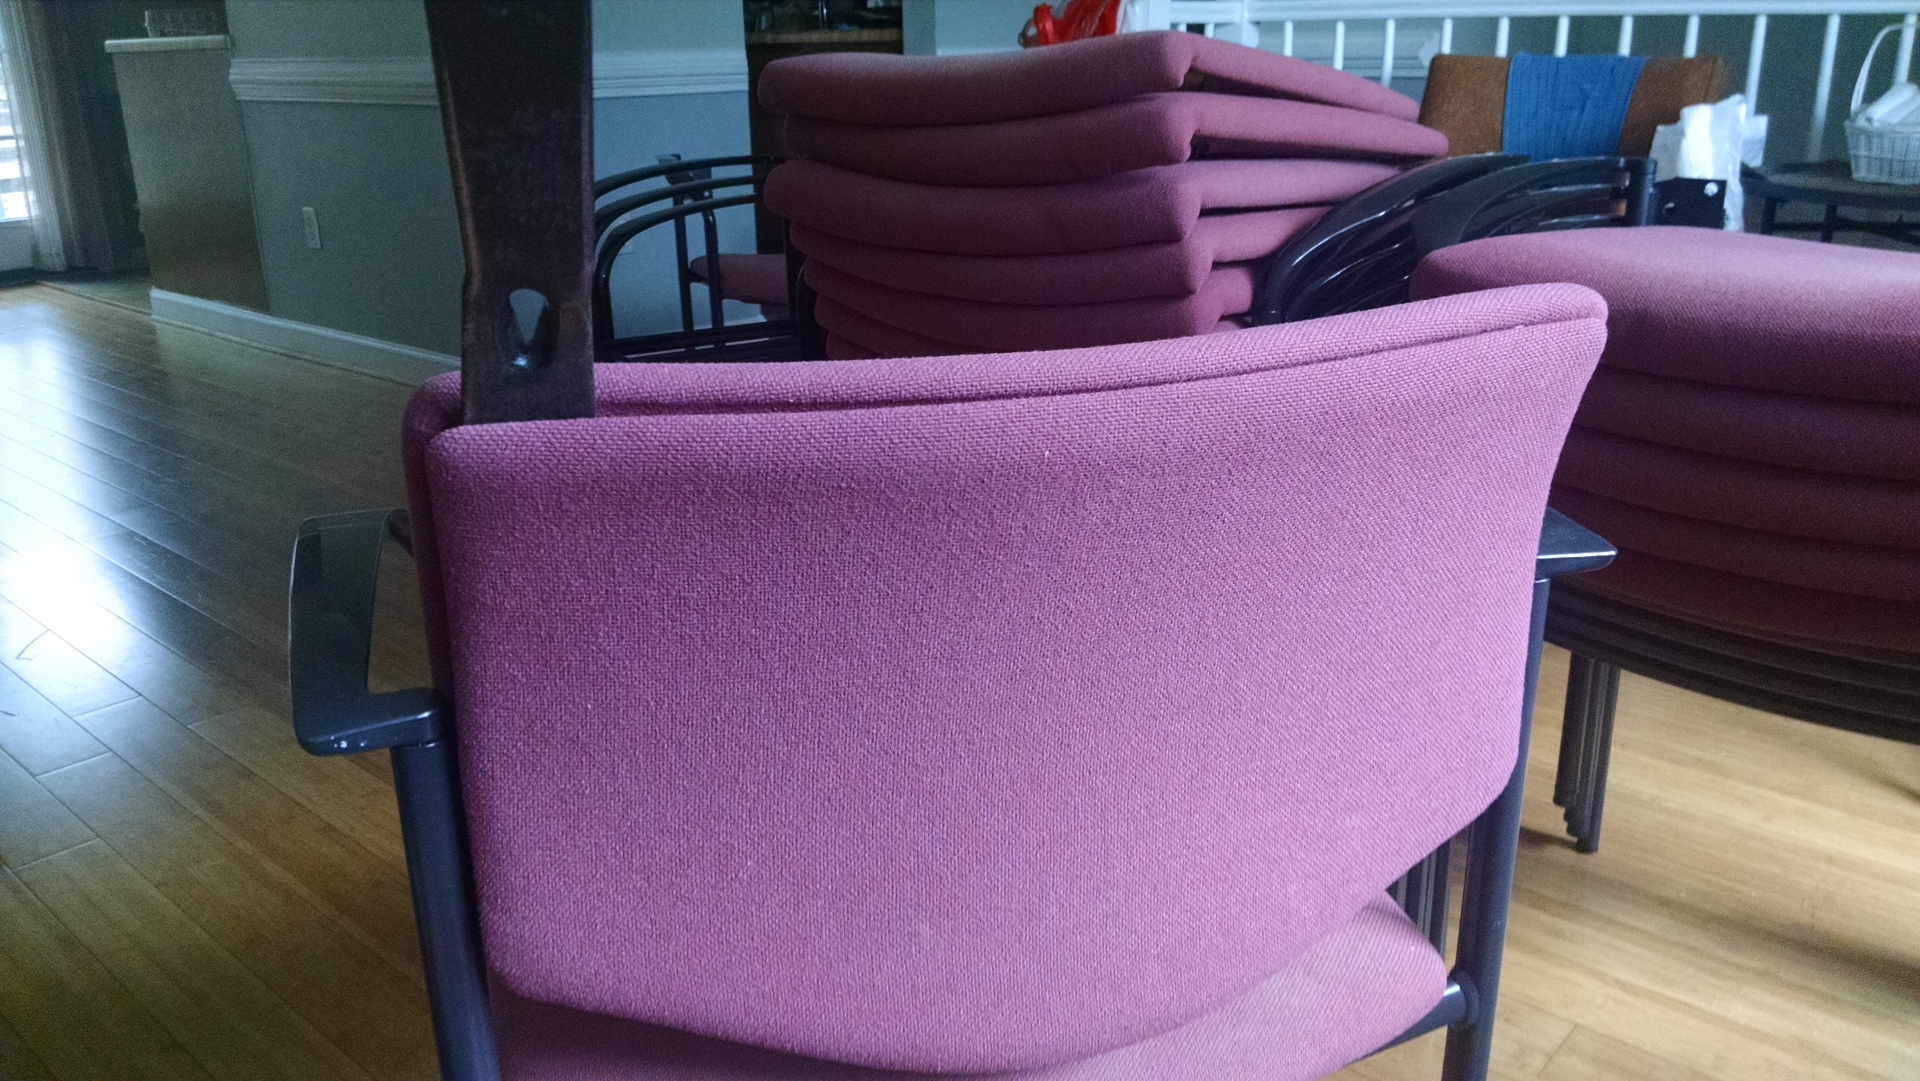
After washing the chairs, we tried using burgundy Dupli-Color Vinyl and Fabric on a small test spot and found that the color rubbed off. Just what we needed. Customers will sit in the chairs, leave with red on their clothing, and never come back. Not exactly great for business.
Another option was using the Tulip ColorShot Fabric Spray from JoAnn, which is supposed to be permanent, but some reviews said it left the fabric rough to the touch and it will take many, many cans to dye all fifteen chairs.
We decided reupholstering the chairs instead would be a better solution, especially since the waiting room chairs are the first things people see upon entering the office and you want to give a good impression. A call to the local upholstery shop returned a quote of $135 per chair. That is over $2,000 to cover all fifteen $10 chairs! At that rate, we might as well buy all new chairs.
Being an avid DIYer, I decided to tackle the project myself. After all, all you need is a staple gun, lots of staples, and some free time.
Step By Step Reupholstery Process With Photos
Use a pry bar to pop the back panel off the seatback. There are five plastic clips holding the panel on for the Steelcase Player chairs. Three at the top; two on the bottom |
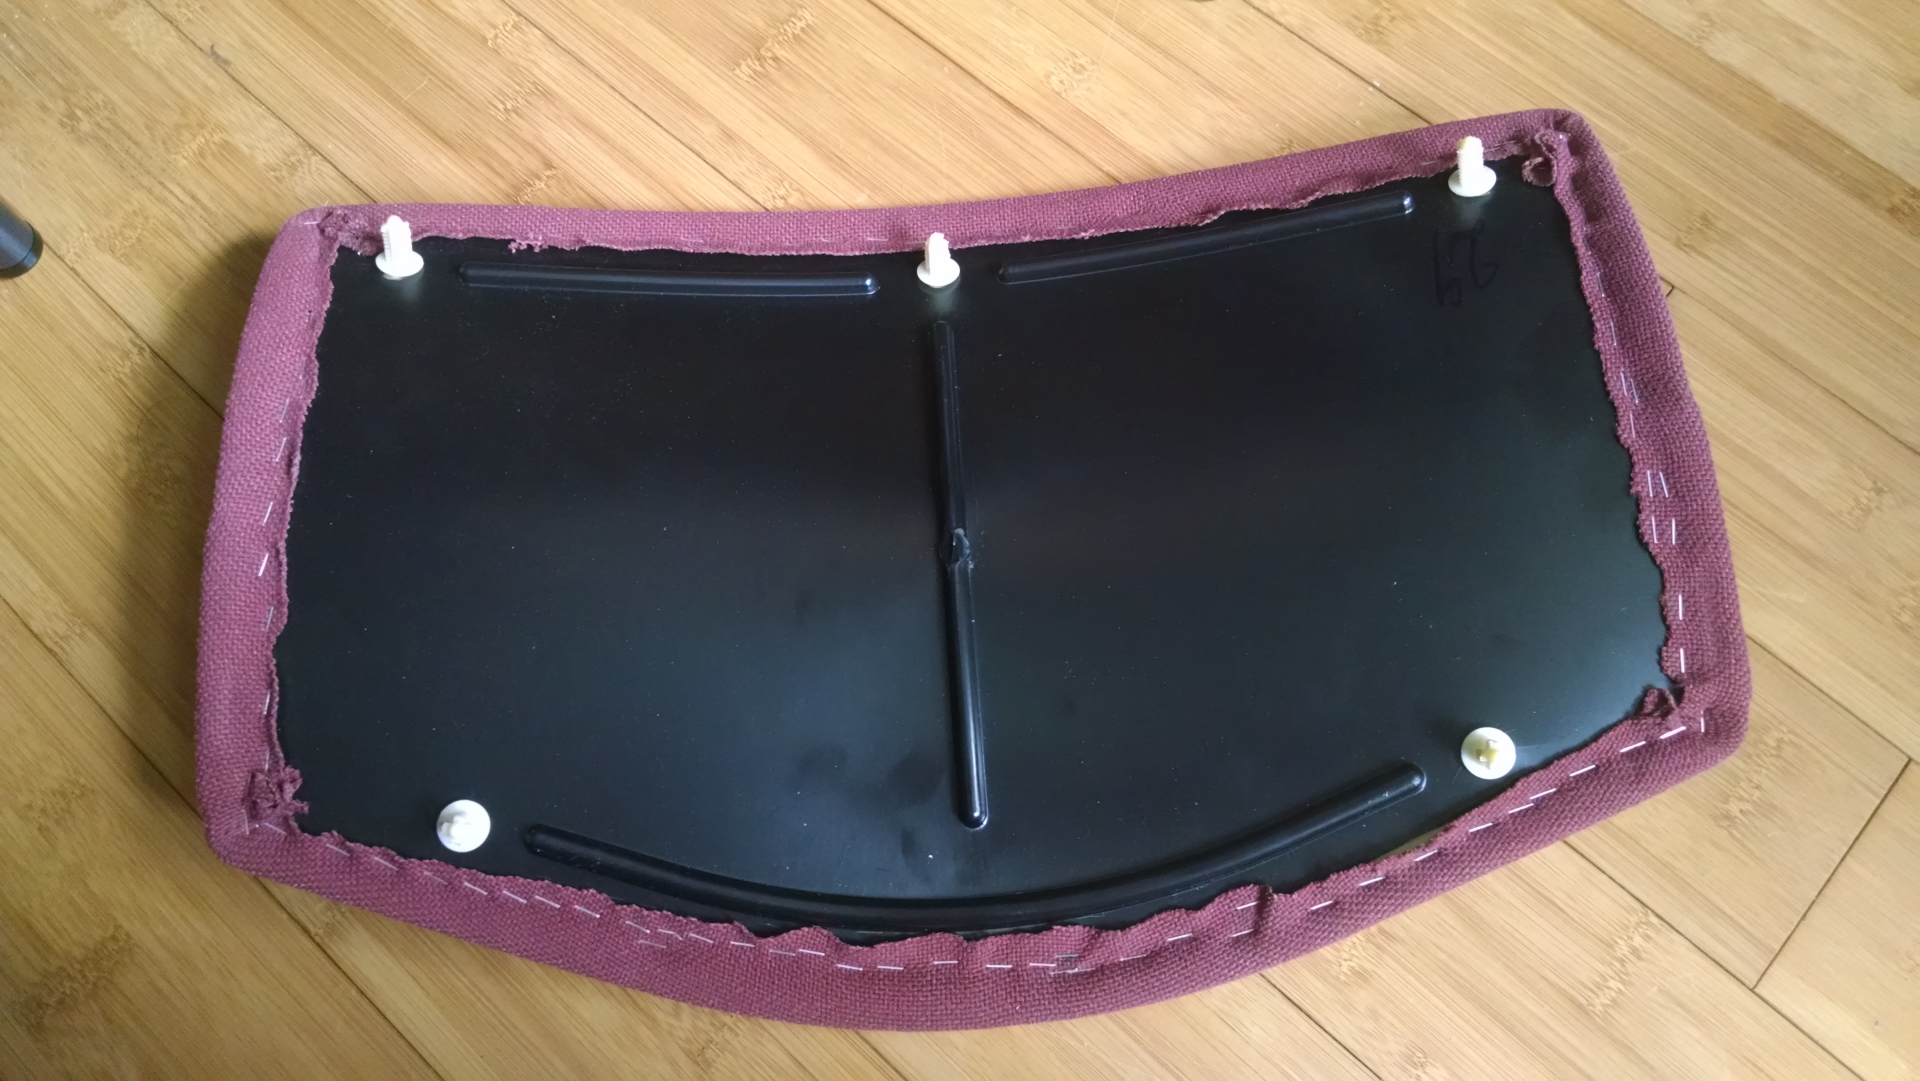
Try to get the pry bar between the clip and the wood seatback. If you try to pry between the clip and the plastic back panel, you will pry the clip from the panel or break the clip’s head off. If you pry a clip from the panel, you can push it back in with a bit of force. If you break a clip, swap it out with the one from the center |
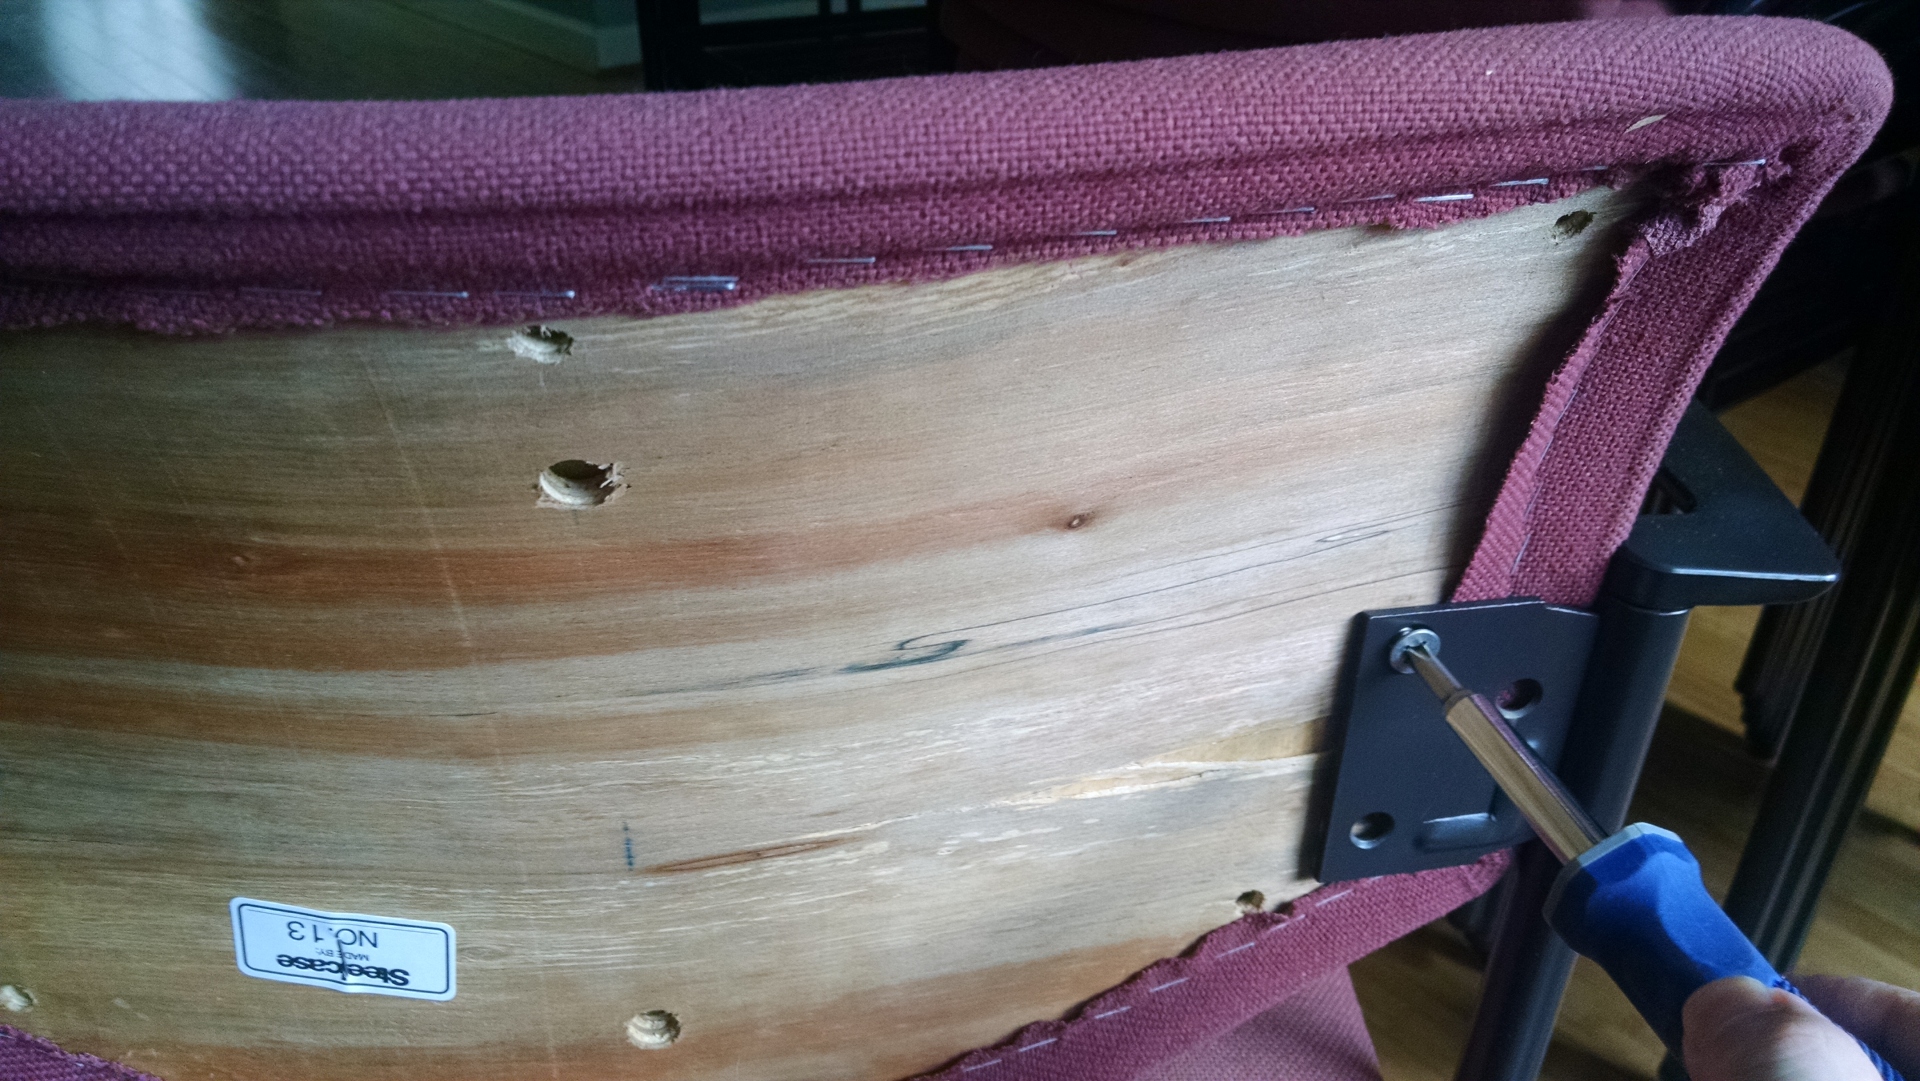
There are four screws holding the seatback to the chair frame |
Seatback removed |
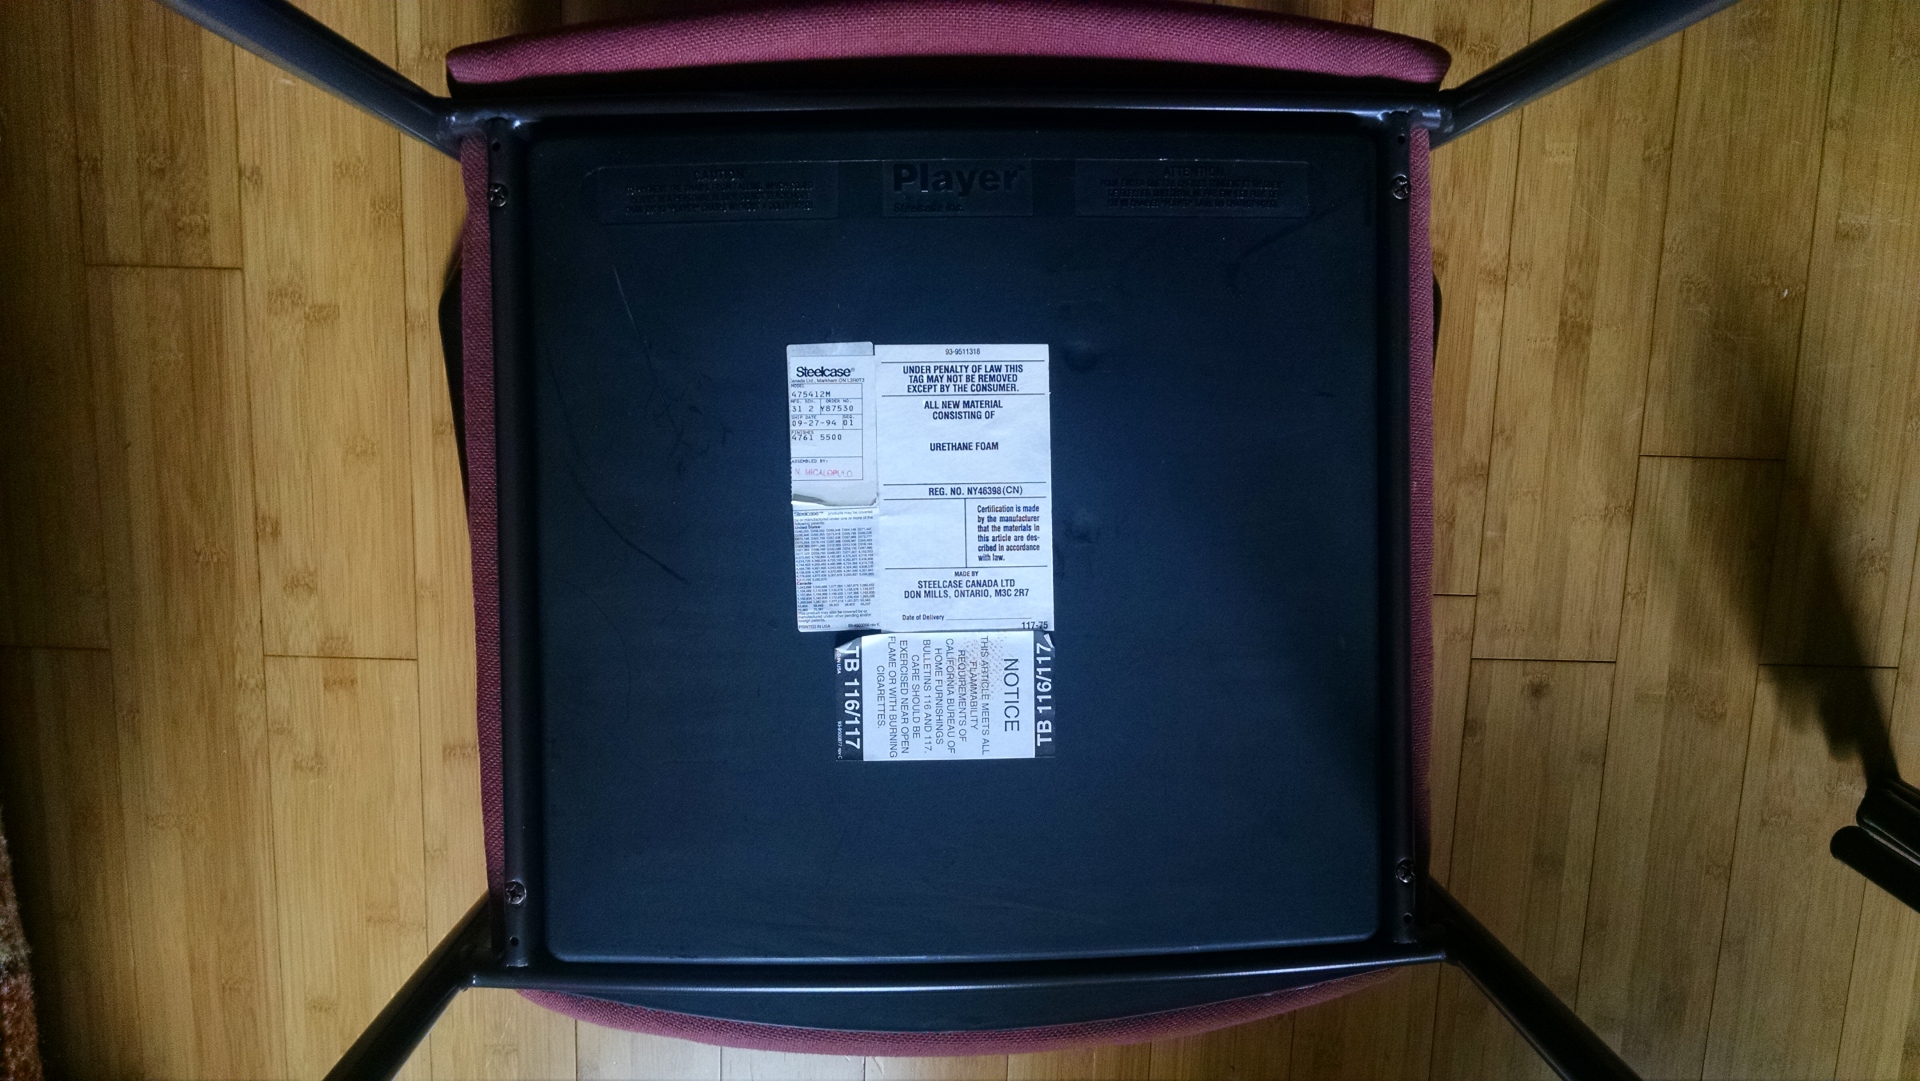
Flip the chair upside down and remove the four screws holding the seat bottom to the frame. Notice the manufacturer date from 1994 on the sticker. |
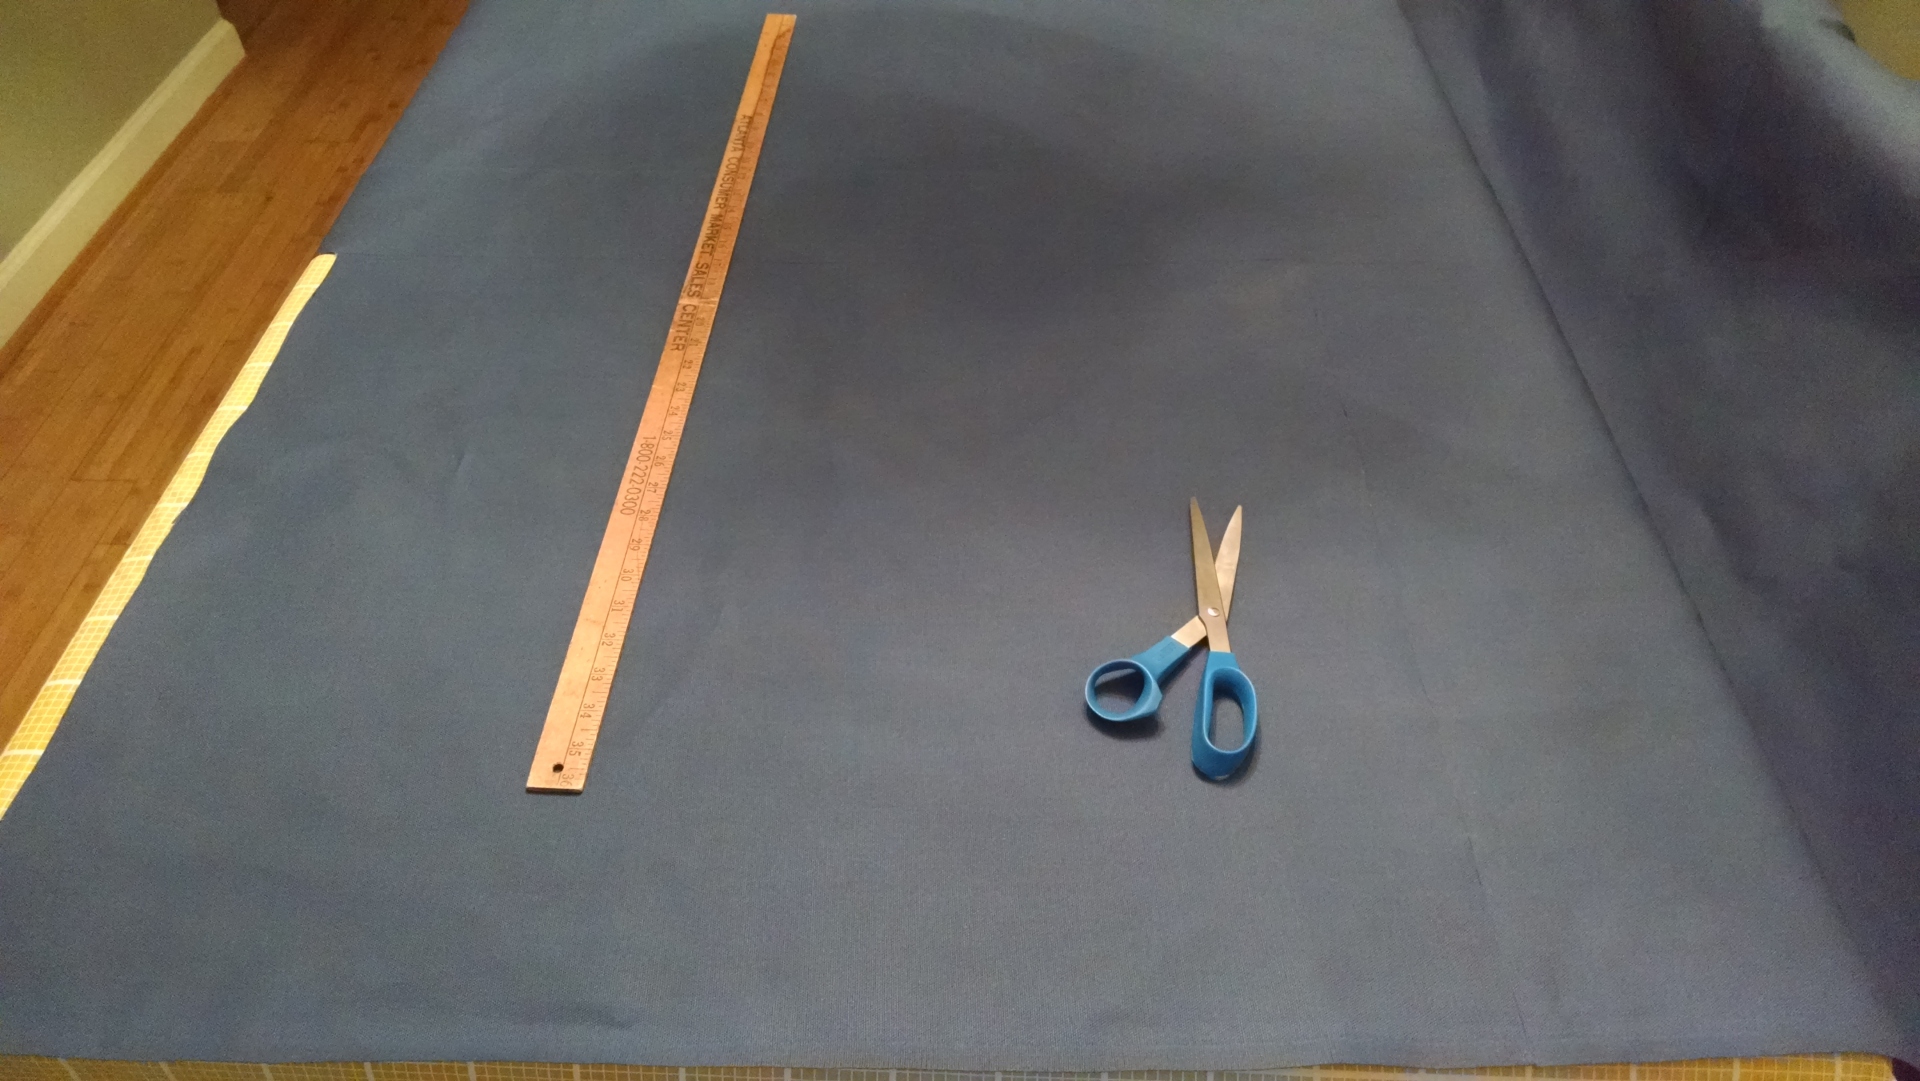
We used duck cloth, also called duck canvas for the new covering. It is a heavy, plain woven cotton fabric used for a variety of applications from upholstery to dufflebags, workwear, tents, and sandbags |
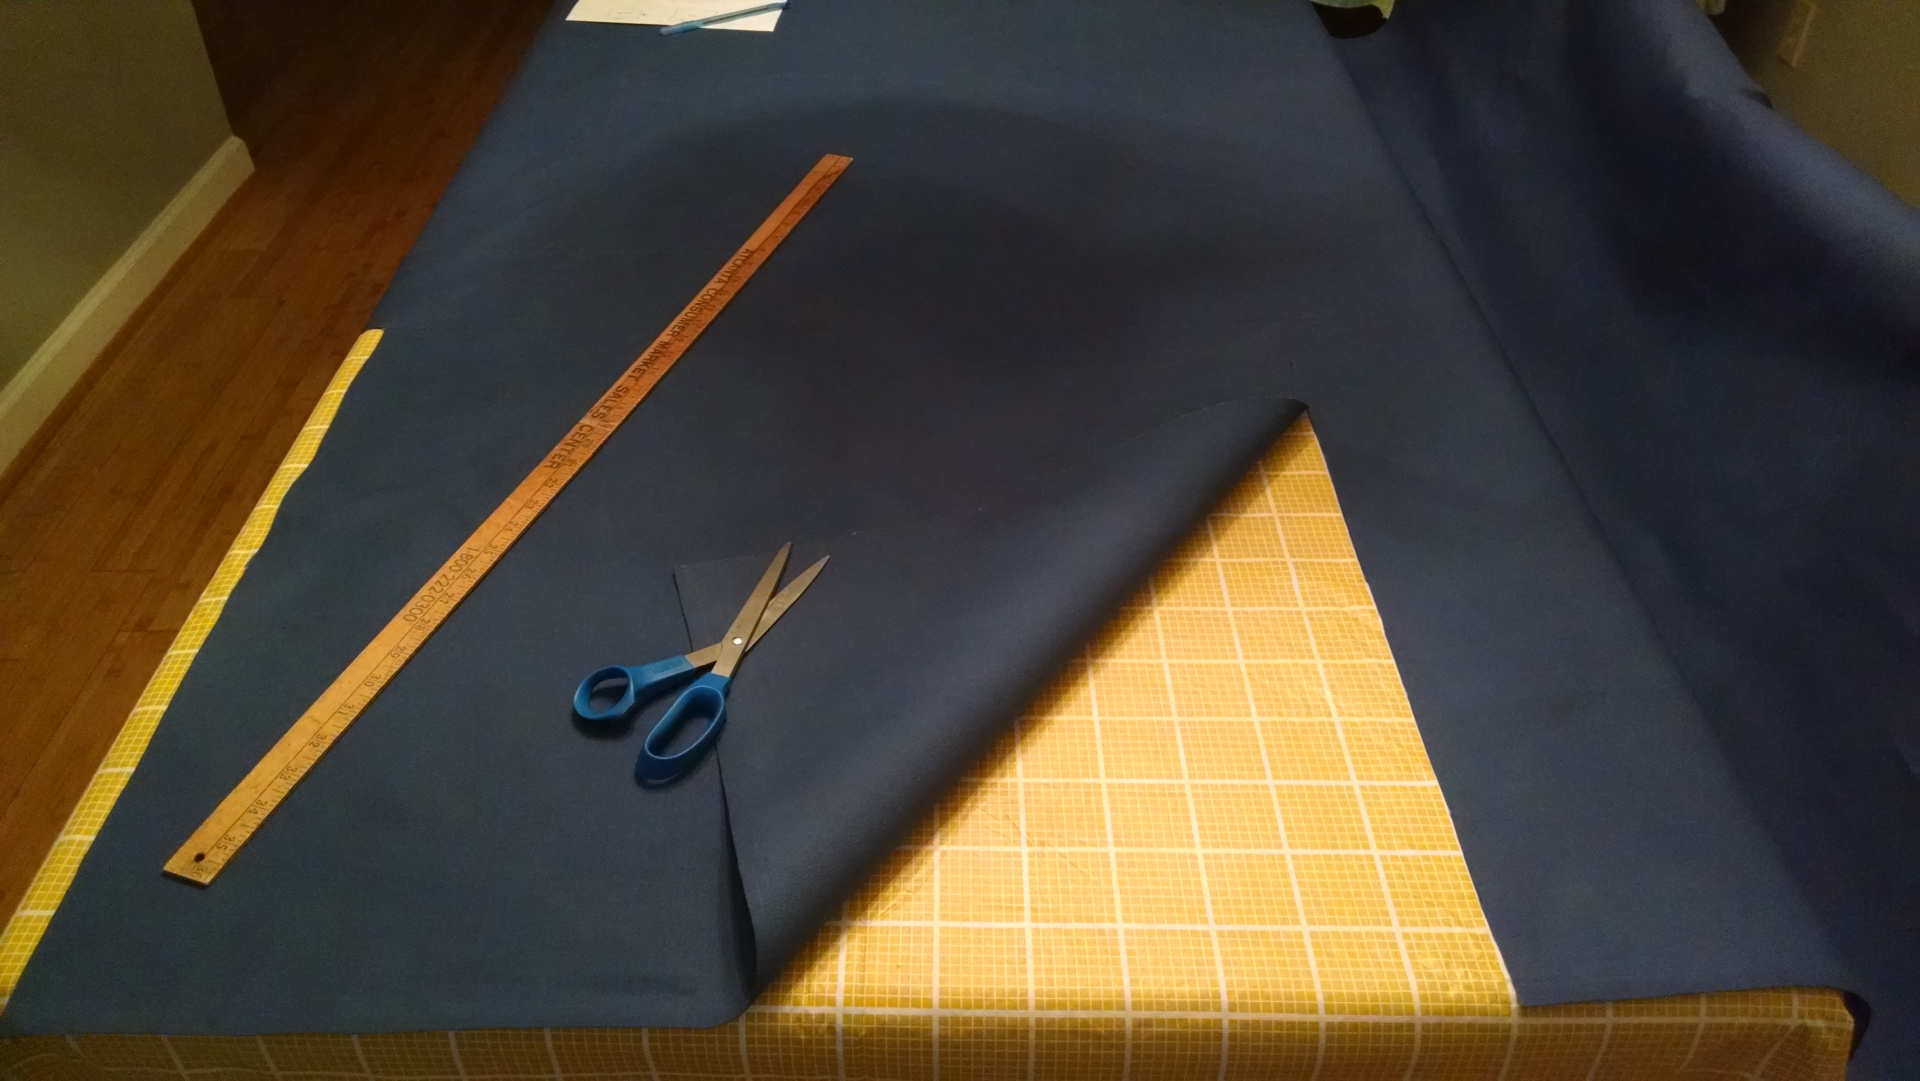
Cut the fabric for the seat bottoms, seatbacks, and the back panels. Remember: measure twice, cut once |
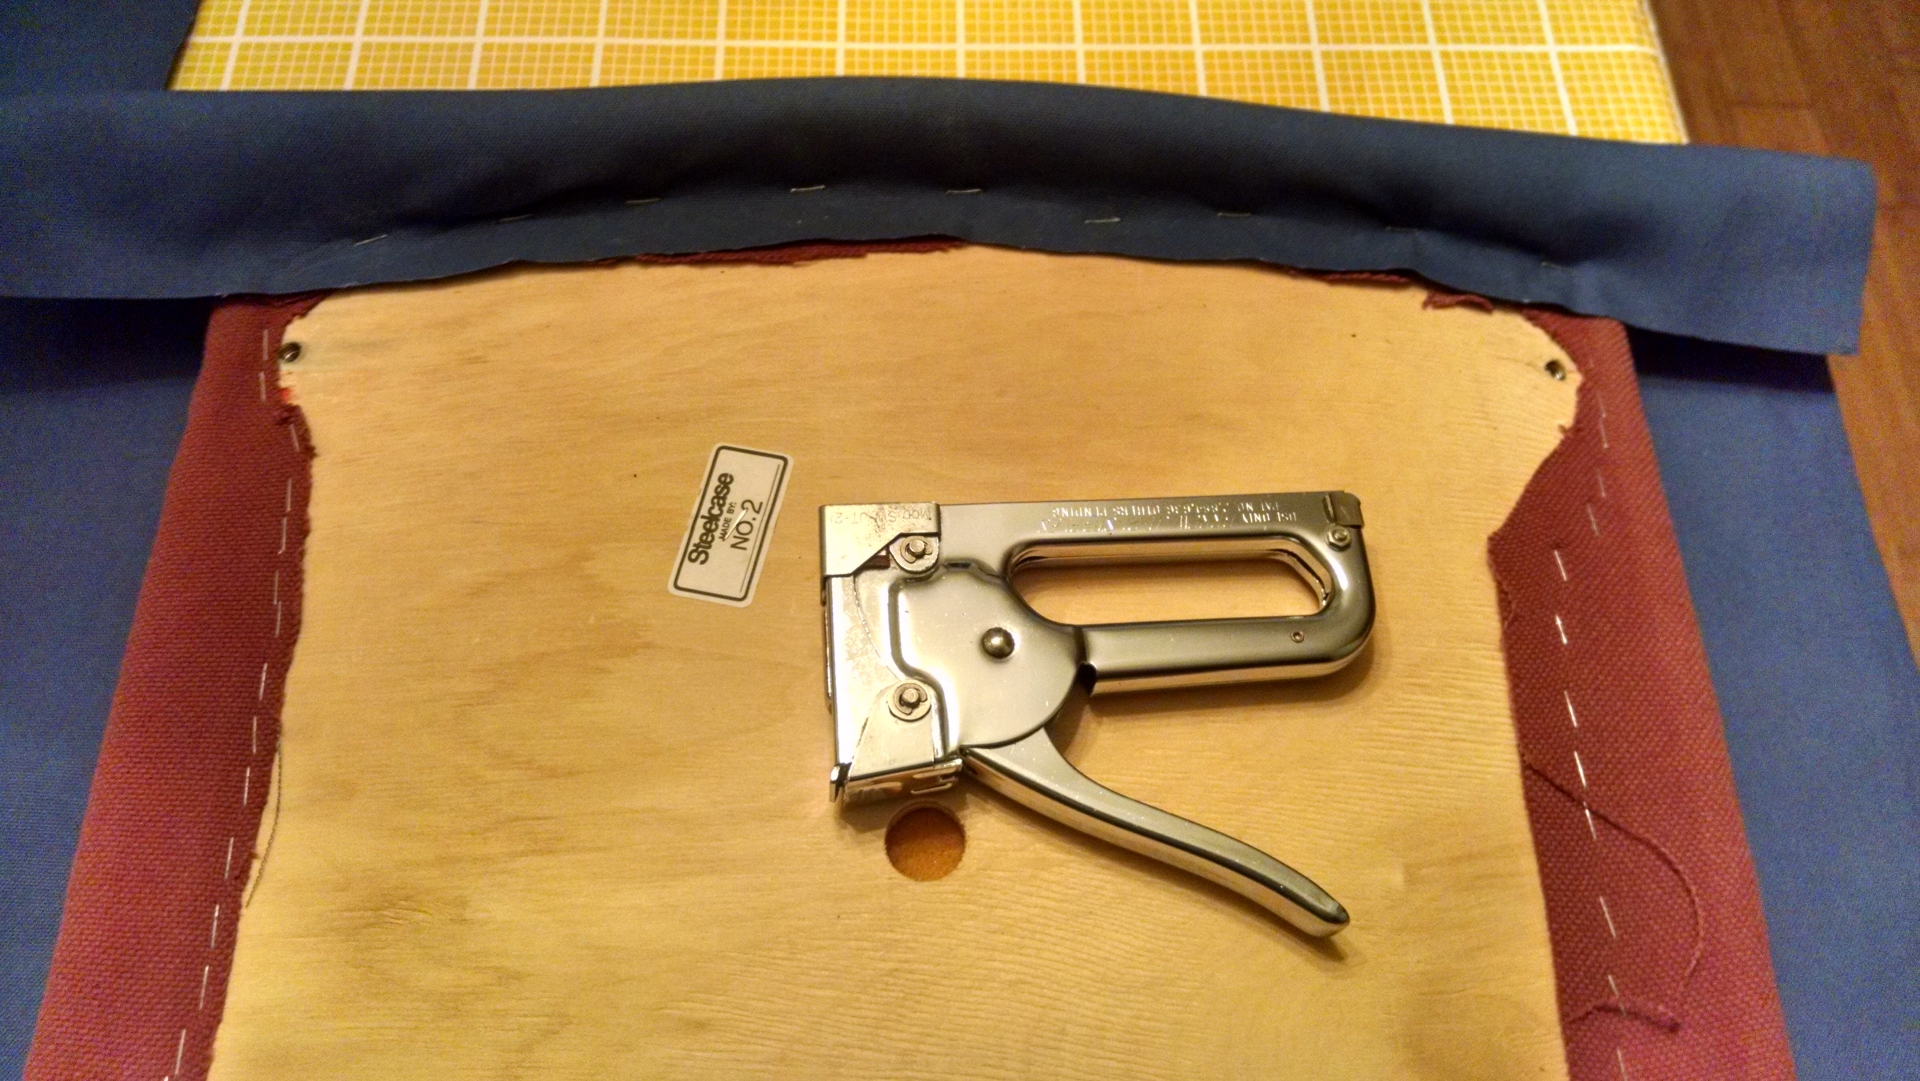
Use the staple gun to staple the duck cloth to the cushions, pulling the fabric tight as you staple. I did not remove the old fabric because they used hundreds of staples per section and it would have taken too long |
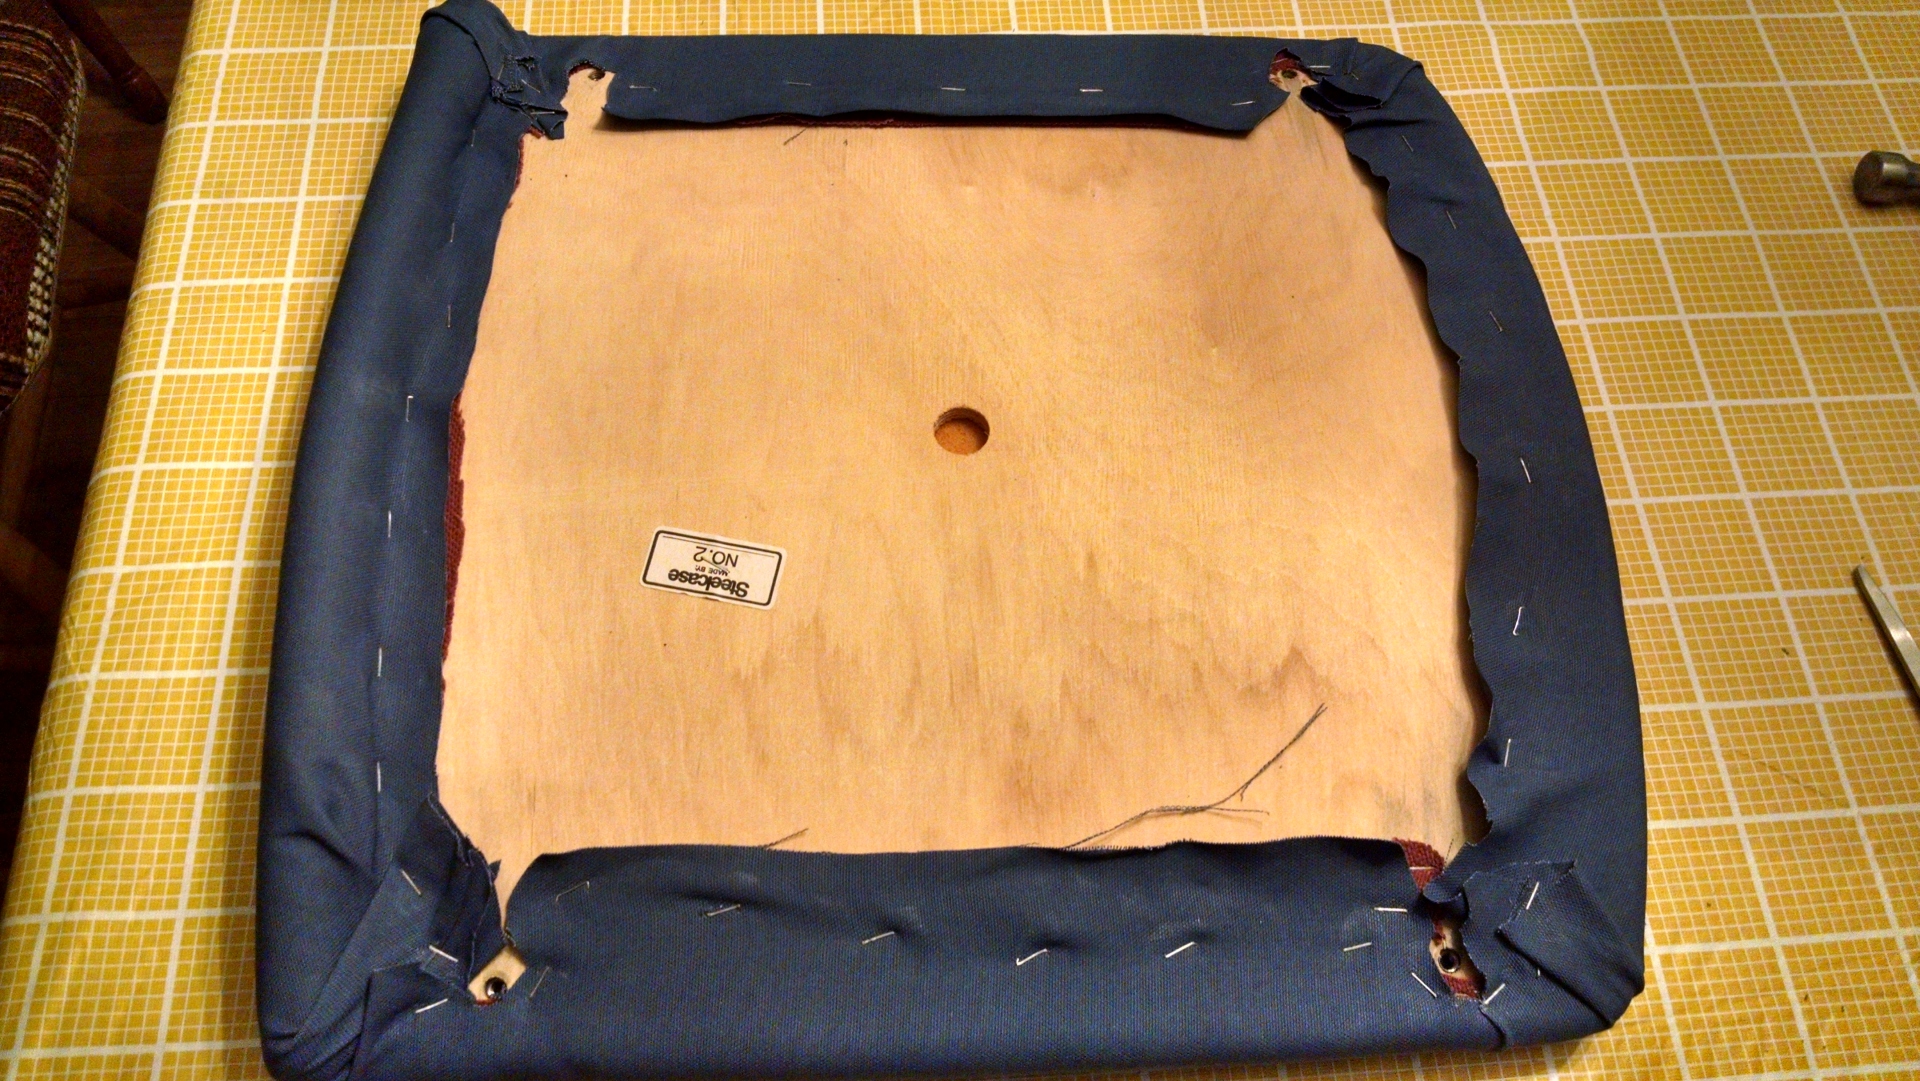
I used 5/16” staples for the seat bottom and seatback. 1/4” staples plus a couple pieces of cardboard from cereal boxes were used for the back panels since I wasn’t able to find 1/8” staples at the store |
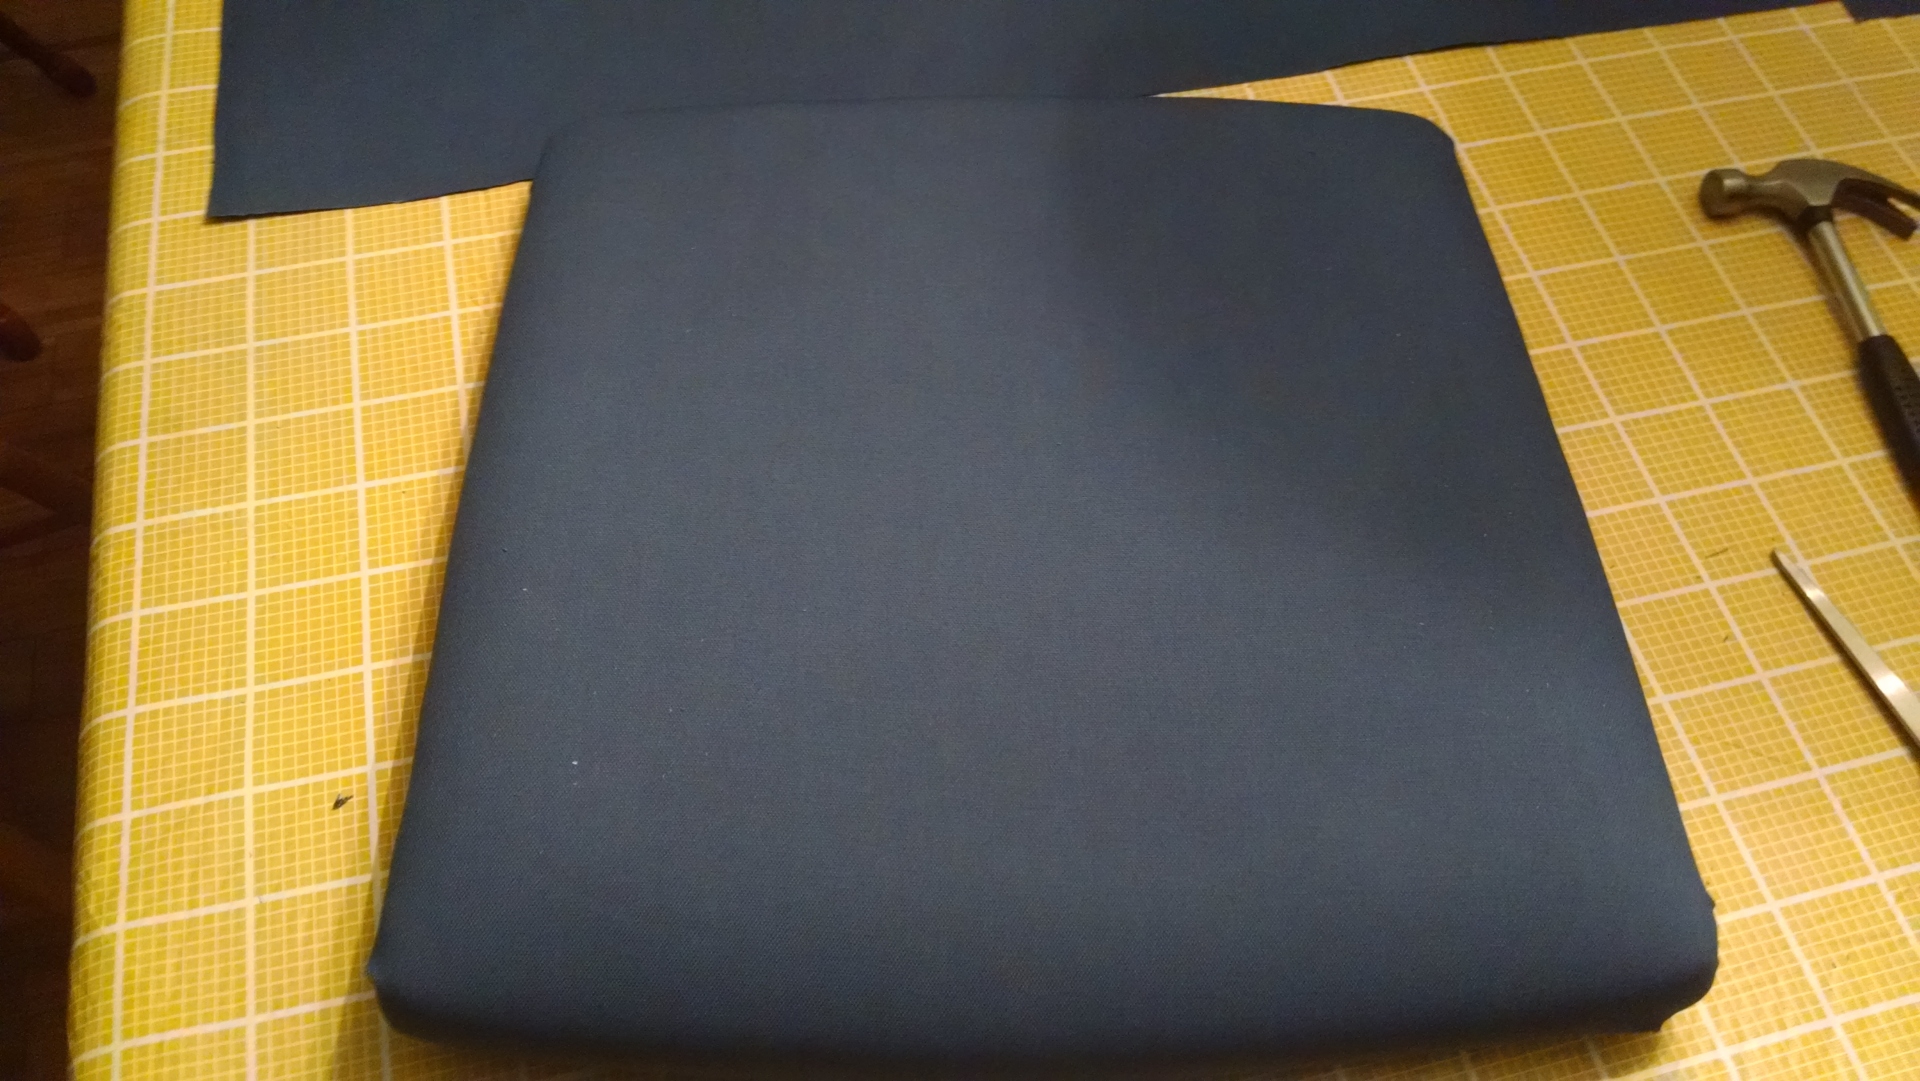
The top of the seat cushion now like new |
Here are the chairs with the seatbacks reassembled afterwards. I left the bottoms off the chairs so I can stack the chairs tighter into the back of the car |
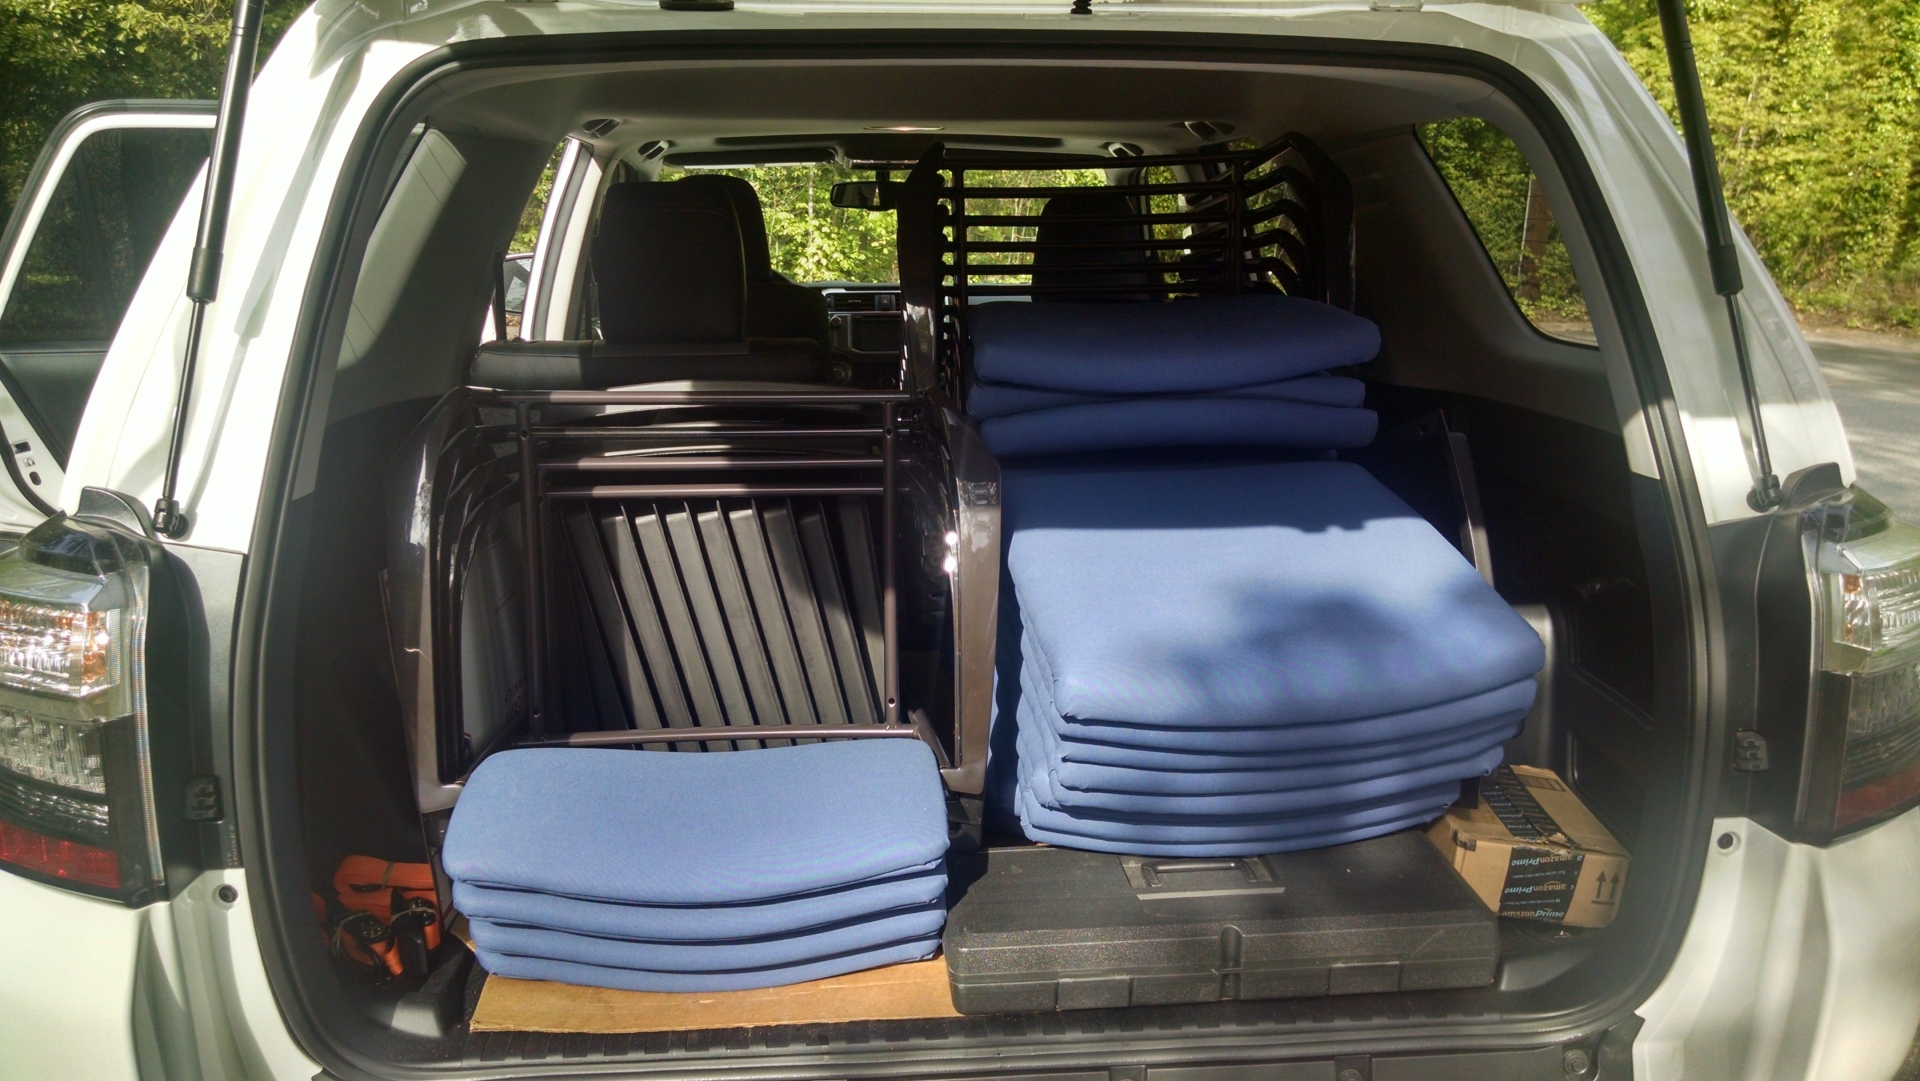
All fifteen chairs piled into the back of the car for the trip to the office |
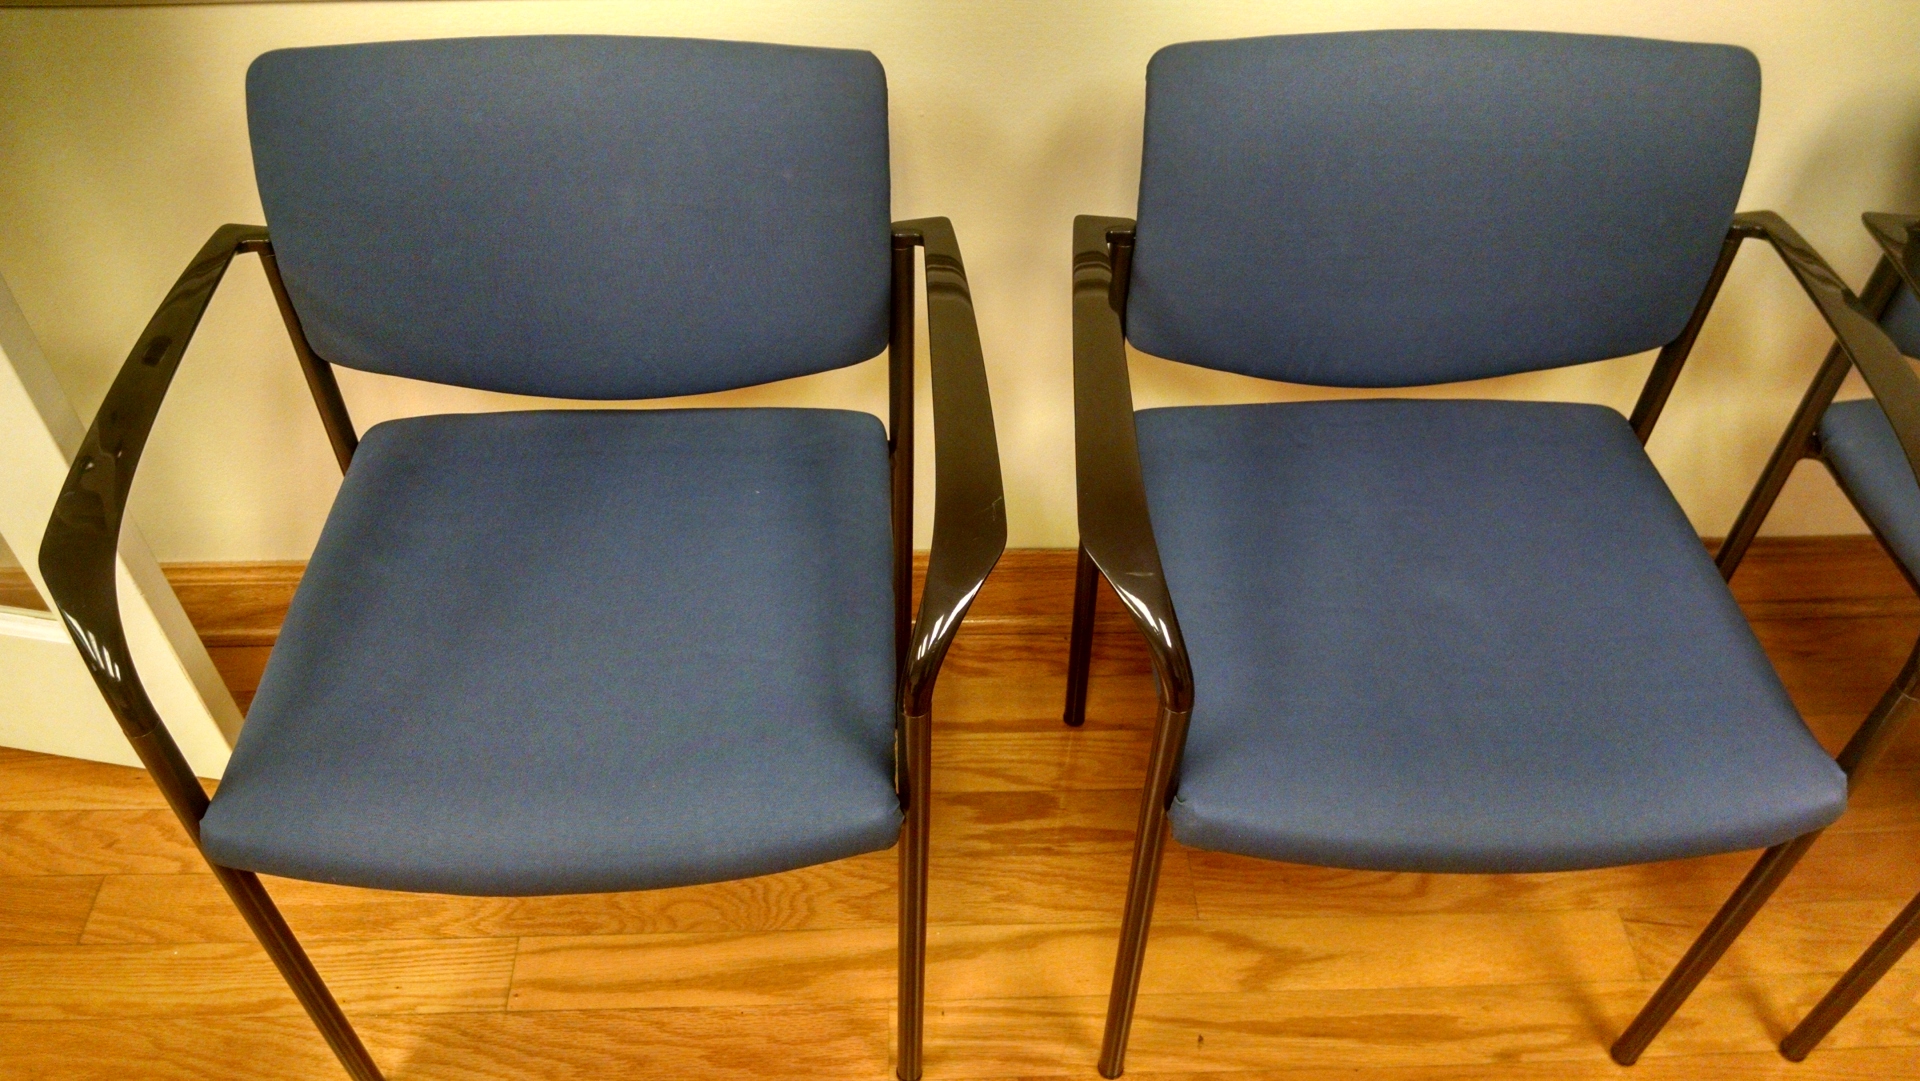
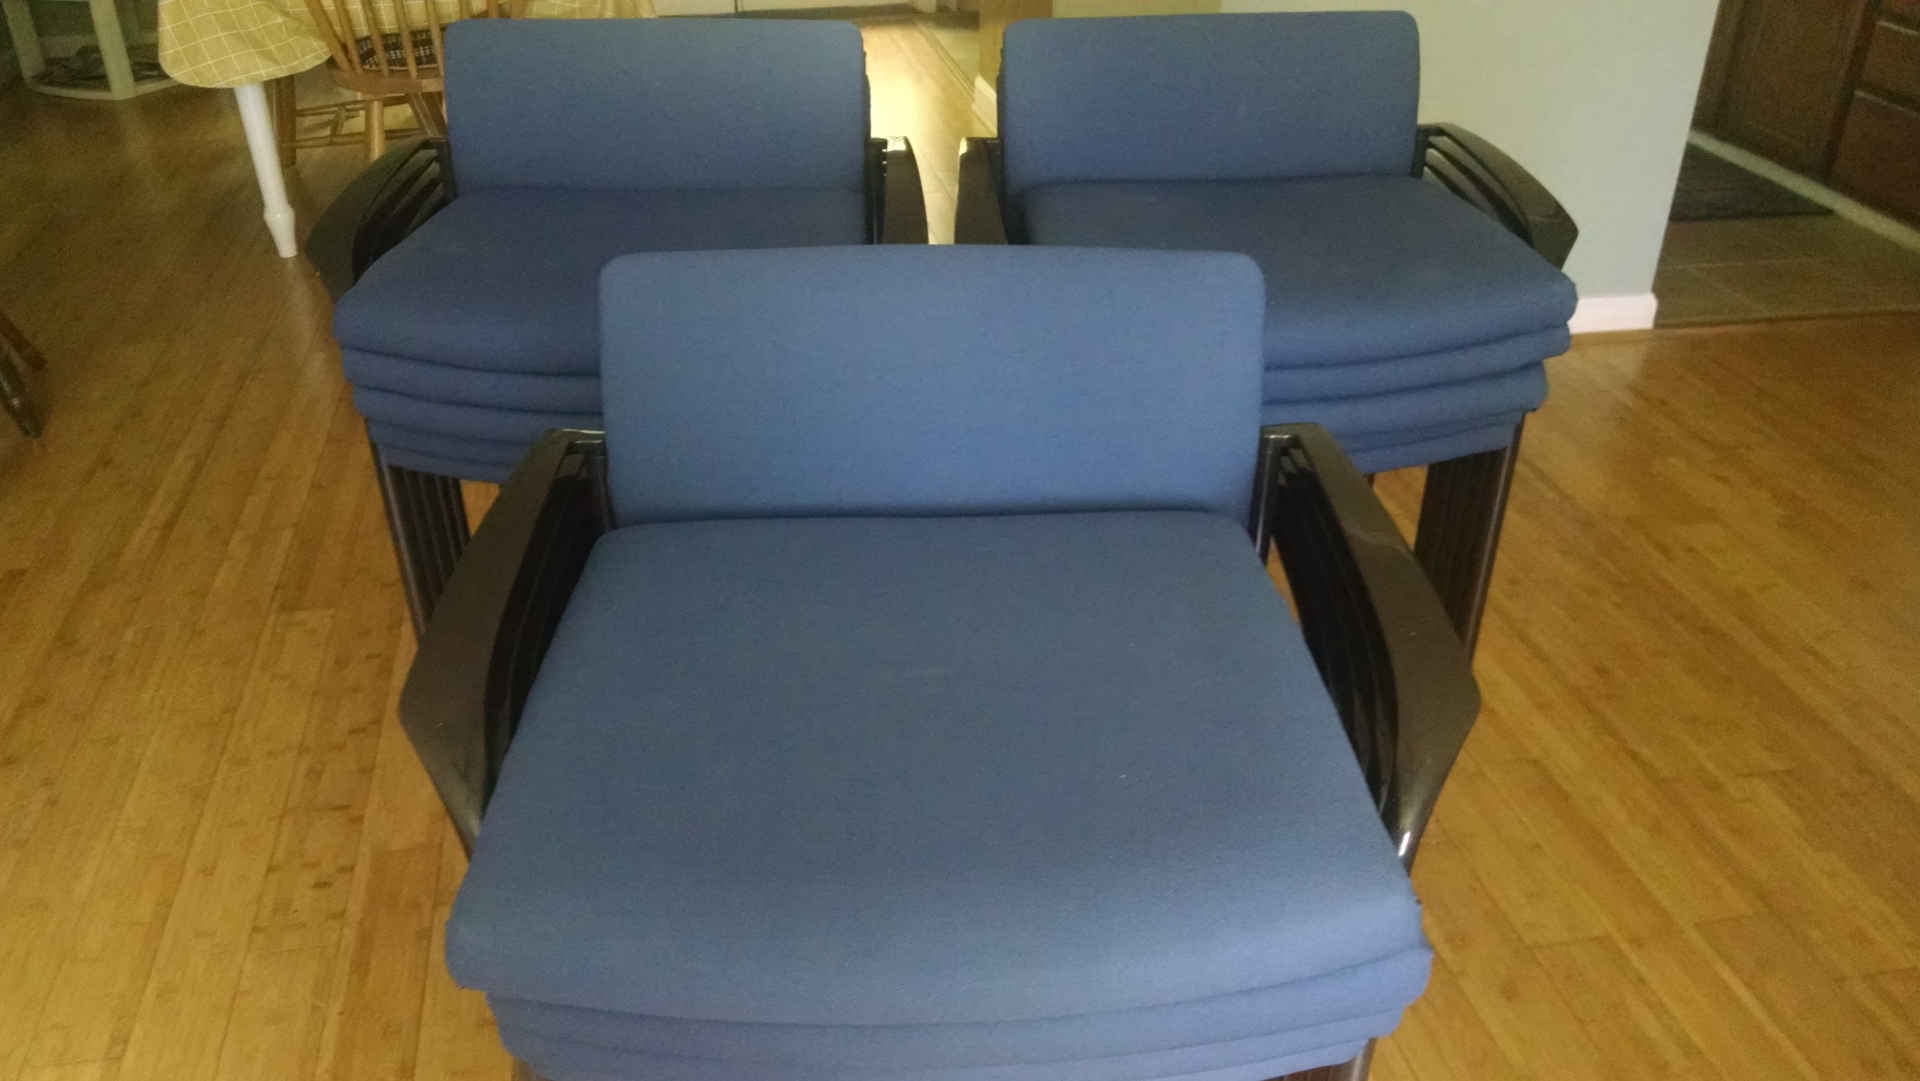
Guest chairs fully put back together |
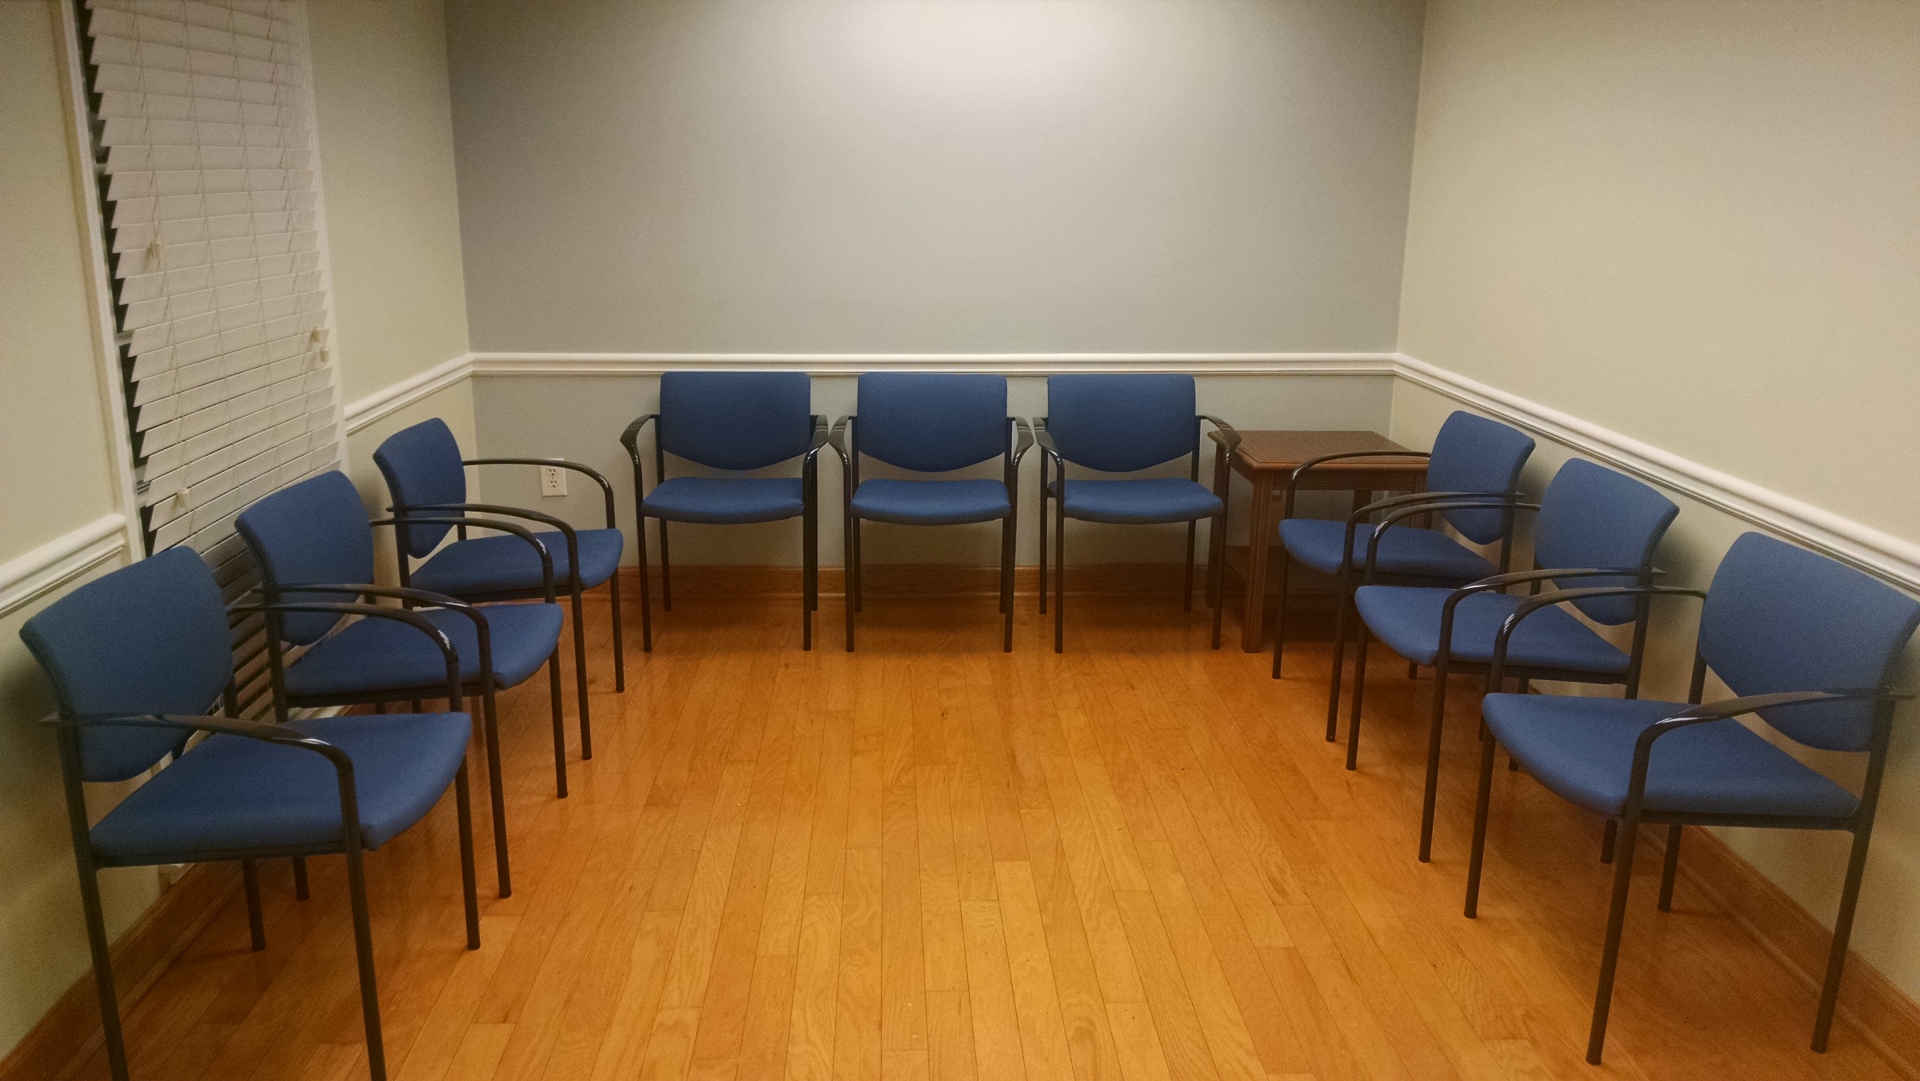
Waiting room chairs ready for guests |
Total Cost of Guest Chairs For The Office
| Item | Item Cost | Total Cost |
| 15 Steelcase Player Chairs | $10 | $150 |
| 11 Yards Duck Cloth x 59″ | $6.99/yd on sale | $77 |
| JT21 Staple Gun | Already owned | |
| 1/4″ JT21 Staples (1000) | $3 | $3 |
| 5/16″ JT21 Staples (1000) | $3 | $3 |
| Total | $233 |
The total cost of purchasing all the chairs and materials for the upholstery project was about $233 or less than $16 a chair. This is a savings of $517 than if we had gotten chairs from Office Depot.
Doing the upholstery project ourselves cost us $83 in materials. I estimate it took about 3 hours to disassemble all fifteen chairs, 3 hours to cut all the fabric, 1 hour to reupholster each chair, and 5 hours to put them all back together. This comes out to a total of 26 hours spent on the project. Anyone who is moderately handy should be able to do this project themselves. This is a massive savings from the $2,025 that an upholstery shop was charging to reupholster it.
I hope this DIY tutorial showed you that the process of making a 24-year-old chair look like new can be easier than you think. Before you throw out an old chair, consider tackling your own upholstery project and save yourself some money. Good luck!
Thank you for a most informative step by step description and the excellent pictures. I had the good luck to find 35 Steelcase Player stack chairs (without armrests) for $1 each. The fabric was nearly worn through at the top of the backrest and showing significant wear at the front of the seat panel. The frame of the chair and the metal sliders at the tip of each leg was in excellent condition. The plywood back panel and the molded plastic seat panel were all in excellent condition. I used then as I got them and they were fully functional but, of course, it was obvious that the fabric was very worn. My plan is to reupholster them. In a thrift store I lucked upon a giant roll (60″ wide, probably 50 yards long) of new heavy weight upholstery fabric priced at $16. Your tutorial answered four questions I had — 1) how to disassemble the back panel, 2) how much fabric is required, 3) whether I could upholster over the existing fabric, and importantly, 4) how much time it would take. My final cost per chair is under $2 plus 1.5 hours of labor.
Hi Paul,
That’s an amazing deal for those chairs. Those Steelcase chairs are super durable and should pretty much last forever. If you need the exact measurements of the fabric I had cut out for the individual pieces, let me know. I had slipped the paper that I wrote them down on into one of the plastic seat bottom panels in case we need to reupholster them again in the future. But it sounds like you’ve got plenty of fabric to spare. Thanks for the feedback!
Hi, quick question. When I took apart the back panel some of the screws stayed in the wood part and snapped when I tried to pry them out. Any idea what those screws are called or how I could get replacements? I know I’m 2 years late to you blog but just came across it today when I started to look into how to take the back apart. Thanks for any help you can provide
I had a few that broke also. Since I had many chairs, I went and took a clip from the center of the panel so there were clips at the four corners to hold the panel on and left the center empty.
Should you want to replace them, you may have to look online on Amazon or Ebay. Look for “retainer clips” or “fir tree clips”. You will probably have to measure and look for ones similar in size and shape to the ones that broke. They seem to be commonly used in cars as fasteners.
https://www.ebay.com/sch/i.html?_from=R40&_trksid=p2047675.m570.l1313&_nkw=+Seat+Back+Panel+Retainer+Fir+Tree+Clip&_sacat=0
Your tutorial is great. I have one question.
Should I staple all four sides and then do the corners or start on the sides and work around ? Oh and what about the contour in the seat and back is there anything special that needs to be done with it or will the fabric ( vinyl ) aline it self ?
I started at a side and worked around so I could pull the fabric taut as I went. On the side, I’d start in the middle and then work toward the corners.
For the contour of the seat and seat back, I didn’t do anything special. I just pulled the fabric tight and stapled.