Cut your own tennis balls to use as homemade sliders on orthopedic walkers and chair legs. This easy do-it-yourself guide shows you how you can make your own tennis ball walker glides to save money over commercial options.
You may have seen people with tennis balls on walkers. Those tennis balls aren’t there for looks but actually have a function.
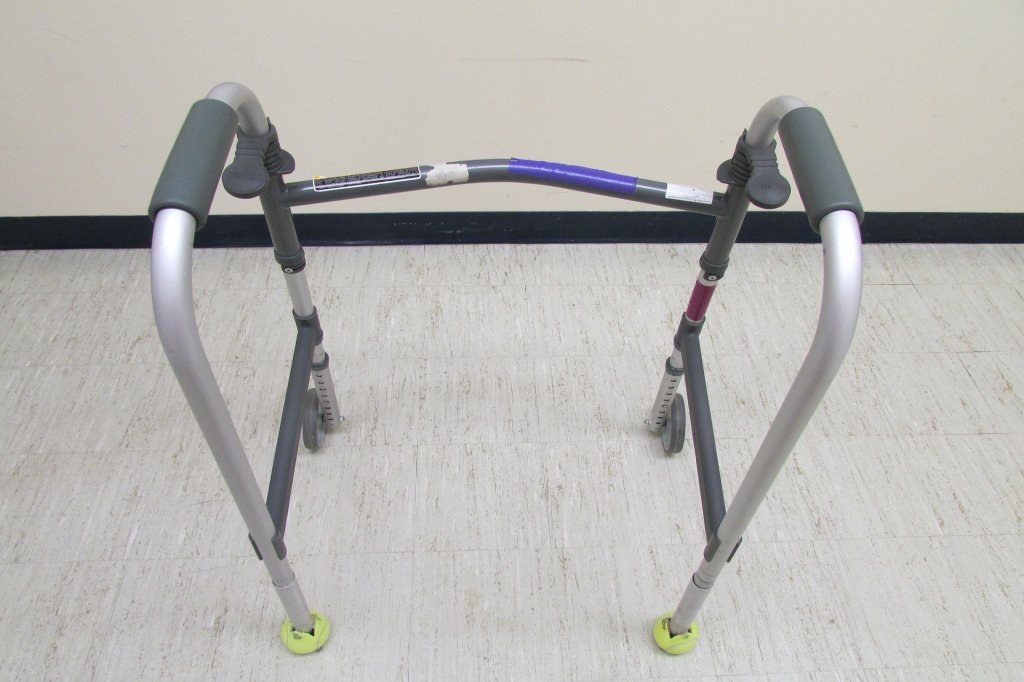
One of my family members has a few patients who use walkers for mobility. Over time, the rubber feet on the walker wear down and they end up pushing around a walker with the metal legs making a lot of noise and scratching up the floors. Without something covering the bottom of the legs, the pavement slowly grinds down the legs and the entire walker will eventually need to be replaced.
You can find pre-cut tennis balls for your walker at your local pharmacy. Walmart has them for sale for $6.74 for two balls. Heading over to the sporting department, you will find Walmart sells a can of three tennis balls for $1.50. That is a 674% markup on a tennis ball simply for being a medical accessory.
Table of Contents
Materials
- Utility knife
- Safe cutting surface like a scrap board (optional)
- Vice or cut-resistant gloves (optional)
All you need to cut open a tennis ball is a utility knife. The trick for easier cutting is to use a blade that is sharp. I’ve seen people using everything from a hammer and a nail or a drill to make the initial hole, and an angle grinder to make the cuts.
You can use a utility knife with a trapezoid blade or a hooked blade for cutting carpet.
I prefer to use a utility knife with a snap-off blade for faster cutting. Snap-off knives come in 9mm and 18mm blade sizes. The smaller blades are better to cut a tennis ball with because you do not need to make such a large cut to get the blade fully inside the ball.
If you are not dexterous with a knife, you will want a safe cutting surface and a way of securely holding the tennis ball to avoid cutting yourself. In this tutorial, I am using a pad of paper to cut my tennis ball on.
Step 1: Gripping the Tennis Ball
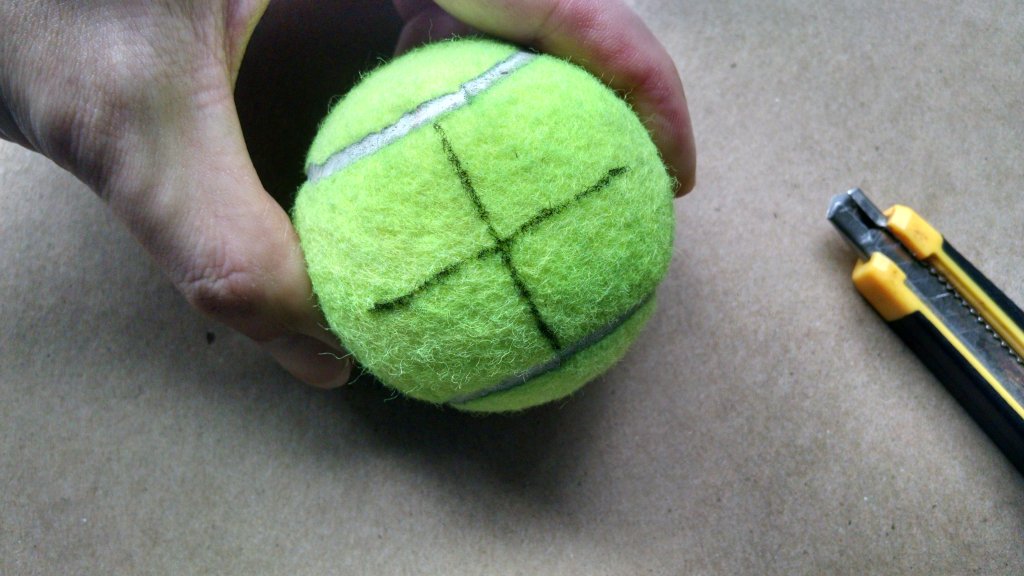
Hold the tennis ball firmly with your non-dominant hand.
Position your hand so you are not cutting towards your fingers if the knife slips.
I’ve drawn an X on my tennis ball to show you where I will be cutting. For a standard walker leg that is about 1 inch in diameter, I cut an X in the tennis ball that is about 1.5 inches long. You may need a longer slit if the rubber feet are still on the walker.
Step 2: Holding the Knife
If using a snap utility knife, extend the blade half an inch to avoid breaking off the blade.
With the knife in your dominant hand, place your index finger on top of the knife with your finger pointed toward the tip of the blade. This will allow you to grip the knife securely without it twisting in your hand.
Step 3: Piercing the Tennis Ball
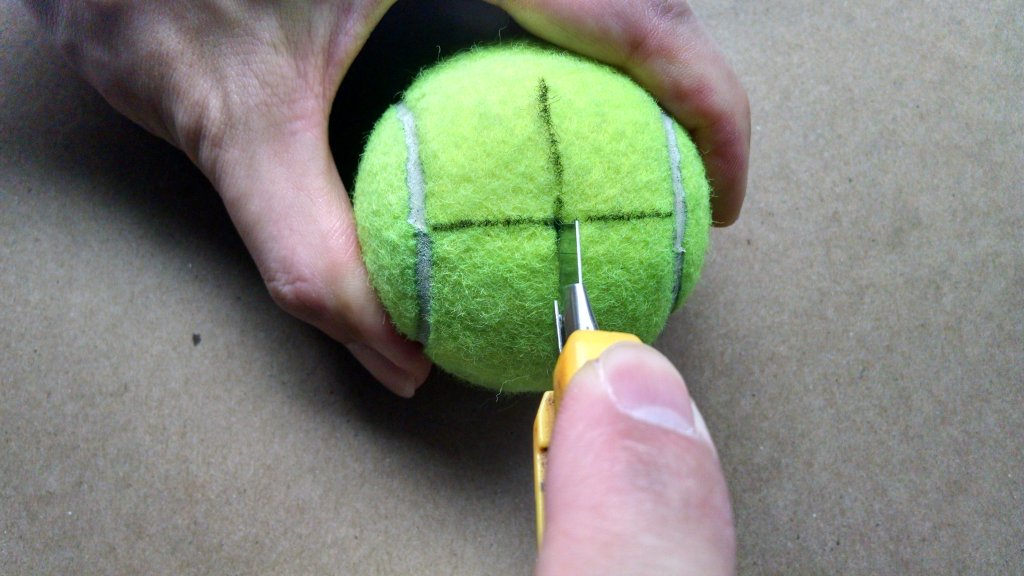
To get through the hard rubber surface of the tennis ball, firmly hold the tip of the blade at a 45-degree angle against the tennis ball.
Make a small stabbing motion where you are pushing the tip of the knife into the surface of the tennis ball. You do not need to use a lot of force to try to push the knife into the ball in one stroke. You will feel the tennis ball depress slightly on each downward motion.
When the knife penetrates the ball, you will hear the air escape from within the ball.
Step 4: Cut an X in the Ball
Once you’ve pierced the tennis ball, the hard part is over.
To finish cutting the ball, I like to extend the blade of the snap utility knife. That way, I can make longer strokes for a faster cut. Extending the blade allows you to keep a bit more of the knife in the ball so it doesn’t slip out and slice into something you weren’t trying to cut. I also prefer to cut on the inward stroke for extra safety.
Start the cut from the center of the ball and cut outwards. Make half the first cut. Turn the ball 180 degrees and finish cutting the slit. Then turn the ball 90 degrees. Go back towards the center and make the next half cut. Finally, turn the ball 180 degrees again and finish the X.
Step 5: How to Put Tennis Ball on Walker
To get the tennis ball on the walker, I squeeze the tennis ball with my dominant hand to open up the opening. With my other hand holding onto the leg, I will push and twist the tennis ball onto the walker.
You will likely see the leg of the walker slip into the tennis ball with one or two flaps pushed inside the ball and the others outside wrapped around the leg.
I like to get all the flaps of the tennis ball on the outside so the rubber on the underside of the flaps is pushing against the leg for a more secure hold. To do this, push and pull on the tennis ball so it is going up and down the leg and eventually, all the inside flaps will pop out.
If you prefer all the flaps to be inside the tennis ball, place the leg at the center of the tennis ball opening and push it straight in with one motion.
Closing $ense
Using tennis balls on a walker not only extends the lifespan of the walker by preventing the concrete from wearing down the legs, but it also keeps the noise down, avoids scratching up your hardwood or laminate floors, and allows the walker to slide easier on the carpet.
Teachers have used tennis balls on classroom chair legs to reduce the noise from the chairs on the vinyl tile flooring.
If you still have the rubber stopper on the bottom of your walker, you do not need to remove them before installing the tennis ball. You will want to keep them there for when you wear through the tennis balls.
When used on walkers, how long the tennis balls will last depends on how often they are used outside on the concrete. A neighbor who walks his dog three times a day goes through a pair in 2-3 weeks. We have one patient who goes through a set every month. Another patient goes over 2 months between changes.
To save even more money on tennis balls, I’ve been able to pick up dozens of free tennis balls at the local tennis court. We keep a box of pre-cut tennis balls at the office readily available for patients to grab as needed. After some practice, I’ve been able to cut a tennis ball in 40 – 60 seconds.
Besides walkers and chair legs, have you used tennis balls on any other things? What are some other ways you’ve cut tennis balls safely?